Quantcast
Channel: The Thunder Guard
Viewing all 93 articles
Browse latest View live

Curious Constructs - The Man Behind It All


In Search of The Ultimate Risk Set

$
0
0
Preface
This post has been a long time coming. I have wanted to broaden my blogging topics for a long time but just never got around to it... until now!! In part this was inspired from seeing Odie's new blog Full Color Gamer, which is dedicated to painting board game pieces. I have also really enjoyed seeing other peoples side projects too. Like Headologist's Alternative History Game "1919", Colonel Scipio's Trench Raider Rules, Admiral Drax's Flames of War stuff, Mordian7th’s MERCS

as well as everybody else's cool interesting stuff that isn't 40K. So here go's, you might wanna grab a beer before starting this one... lots to tell! 

Risk and Life
Risk. What a game. Since I started playing it as a kid I have seen it both forge and shatter friendships. Some of the most memorable games I have ever played was back when I was in officer training at HMAS Creswell (the Royal Australian Naval Collage). Someone had a Risk set at the time and all of us - young budding ‘military leaders of tomorrow’ treated the games as serious as our formal military training! I swear that the aftermath of those games may have changed people’s careers. It is certainly true that the alliances and backstabbing changed how we treated one another during training....
"Yeah, sure I’ll swap my duty shift with yours, after all mate, you had my back in Egypt!"
Or
"You can’t trust Middle Watch; Smith is leading them this week and don’t forget what he did to you in Europe!"
-Said as if ‘Egypt’ and ‘Europe’ referred to an actual event rather than a simple silly little game!!
After I left the military I played Risk with my new mates. My good mate Jeff enjoyed it so much I got him his own set for his 30th. Later at my wedding his Best Man speech was full of hilarious Risk references. Even to this day, if I start to get annoyed with anything, my mates will say “it’s not Europe” in reference to the time I completely lost my shit during a Risk game.


So yeah, Risk has been influential in my life and probably deserves some special treatment. Thus, I set out to create The Ultimate Risk Set!  


My First Risk Miniatures
It all started one boarding Sunday afternoon back in 2010. I thought I would paint up a few risk pieces to snazzy up our games. I was aiming for minimum detail, just a quick and easy job so that I would eventually get through them all.
Starting with the ‘green’ nation I decided that I’d try and keep to historical coloured uniforms, so they became Russians. I also painted up the 'British' (Red)  and the 'French'(blue) but unfortunately they are not still around.
 
 
My Improved Risk Miniatures  
I found myself trying to add detail to the men where there wasn’t any.  So I decided to upgrade the units to 15mm Napoleonic figures! I used ‘AB’ miniatures from Eureka miniatures.


I cut and filed the bases down a little and then glued them to 6mm nuts. I then filled the centre of the nut with a mixture of sand and glue, which gave a rock solid hold between the figure base and the nut and also added extra weight. Originally I glued felt to the bottom of the nut. They looked great on the board but had a tendency to fall over with the felt base.

Base filed down, glued then green stuffed.
 

My Improved Risk Board  
Some time later I went on a trip to the US and while over there I picked up the RISK Onyx Edition. Nicer cards and a beautiful big wooden board would compliment my new painted figures well.   

 A game with a few new and old pieces.

My Improved Risk Board Mk2
To get around the issue of the models fall down, I decided to upgrade my board with tin plates on each territory. Likewise I glued a magnet under each nut to hold it to the board. The felt was still too thick, so I replaced it with fabric tape.


I never got around to finishing these and gluing them onto the board . They were just too hard to cut. I am planning to go back and finish it at some stage though!


Changes to the Rules

I had the 2003 edition rules and the 2009 edition rules (from the Onyx set). After searching on the net I found the earlier editions and compared how the game had changed over the years. I decided that for my Ultimate Risk set I would pick out the best elements of each edition’s rules and combine them. I also started toying with the idea of my own changes and tweaks to the game.


But then I ran into Castle Risk!

This game was produced back in 1986 and has a few really cool changes from the ‘normal’ game. Firstly, it is played on a board of Europe.

 
The aim of the game is to capture your opponent's castles (and flags) rather then hold the whole board or defeat every unit. This has the advantage of shortening the game time which is sometimes a problem with Risk.


Rather than collecting territory cards you also collect castle cards which give you access to special one-use abilities. These are awesome! Using a General or Marshal card betters your dice rolls in attack or defence respectively. An Admiral allows you to attack across the ocean (which changes everything!). A Spy allows you to look at a player's card hand and eliminate a card from it or defend against another spy. A Diplomat forces a truce with another player for one turn. And finally, Reinforcements give you additional units, as there is no other way to ‘buy’ them by handing in cards.


I loved all of these card so much that I had to include them in my Ultimate Risk set! Following this decision my game went through many rule rewrites. With my mates, we would go over and over and over the changes, playing games in-between. It was loads of fun but I thought we would never end up with a final set of rules, ever!
 
Well, we finally did it! My biggest desire was to cutting out anything that was too complicated from our new big rule set. The result is a game that plays mostly like the standard Risk game but with lots of cool extra stuff. It is also a game that is simple when it begins but escalates as it goes on, so first time players are not overwhelmed by all the new rules.
 
Our Alternative Ultimate Risk Rules
I’ll save a more in-depth look at how it plays for another post but here are the basics:
 
The aim of the game it to capture other nations flags, which are held at their castle, while defending your own (like Castle Risk). 
 
There is no need to capture whole continents but doing so will still get you the same bonuses in extra units, so it is a strong strategy like in the original.
There are mission cards (like the later version) but you don’t need to complete them in order to win.
As you complete missions you draw ‘Castle Cards’. These are the character cards from the castle risk game. Instead of being one use cards they are special units that you deploy on the board. They are powerful and useful in their own right but they also unlock other ‘components’ of the game.
Each nation’s castle (and flag) is set up at a specific location -for example British in Great Britten, French in France, Russian in Russia etc.  
Each nation has a deck of Nation Trait Cards, of which you can choose a certain number. The traits relate to the nation in some way and have in game effects like starting with a special character, starting with more men, gaining rerolls that you can use at any time, the ability to draw extra missions or re draw castle cards, or most importantly, starting with colonies (other territories).  
This is a really interesting twist because if people don’t pick their colonies then the board starts relatively empty. So there is the choice to start with more men, better abilities or lots of territories.
This part of the game evolved from the fact that having fixed starting positions meant that some nations have an advantage. With the traits however, every game is completely different but somewhat even.
-In one game the French started with no extra territories but with a General (Napoleon) and a massive massive army. They ripped through Europe until the Russian player played a dirty trick card called The Russian Winter. It was just like history playing out on the board!
At the end of your turn you collect gold for each territory you conquer (like the cards in the original) and you can use it to by extra units (as well as other ‘components’ that you have unlocked).
One last twist is that you don’t need to leave units in a territory to control it. You can simply plant a small flag and move on. This really is an awesome twist. It means that you can put units where they need to be rather than having to spread your army out everywhere. This rule really enhances the game play and level of tactics.
As I said, I will follow this up with a full rule post, but that covers the major stuff!
Now let me show you all...
 
My Risk Gaming Pieces
These are the castles with their flags.
 
Here are some of the other nation flags that I am still working on.
 
The flags are simply aluminium foil on a copper rod.
 
Here, the British are defending their National Flag.
 
And here they have captured two other flags.
 
The plain flags are the 'territory flags' that you use to claim territories.
 
The small flags are just map pins from a stationary store, on a nut, with DAS modelling clay on the top. I have magnetised these too.
 
Here are a few of the Trait Cards. They are printed on paper and pasted onto thick card.
NB I didn't mention this above but some traits are worth more then others (denoted by the number of flags in the corner) and some traits are negative - which allows you to choose additional traits.
 
This is the back of the Trait cards.
 
I used a stencil and silver spray paint to make them.
 
Each player receives their Trait Cards in a little diplomatic satchel (for fun).
 
 These are the mission cards.
 
There are several types of missions. The higher the rank on the card the harder the mission and the bigger the reward in Castle Cards.
 
I have made lots and lots of mission cards!
 
When you complete a mission you get Castle Cards.
These are the original ones from my Castle Risk set.
 
Marshal
-Use a big 3-8 dice in defence (equivalent to a D6 +2).
   -Get an extra Manoeuver at the end of each turn. 
-Can retreat if attacked.
Unlocks:Fortified Territories
costs 5 gold each.
Enables you to roll 3 dice in defence.
 
General
-Use a big 3-8 dice in attack (equivalent to a D6 +2).
-Get an extra Manoeuver at the start of each turn. 
-Can retreat if attacked.
Unlocks:Officers (the little guy)
costs 1 gold each.
They can also manoeuvre and retreat  
 
Admiral
-Use a big 3-8 dice in Sea Battles (equivalent to a D6 +2).
-Allows armies to attack by sea
Unlocks: Naval Fleet (ships)
costs 3 gold each.
Can attack other ships and hold oceans like territories
 
This is the big ship that you use if attacking across the ocean.
 
Diplomat
-Force a truce across a boarder
-Force a nation wide truce
Unlocks: Cities
Each city counts as an extra territory (generating more wealth)
 
Spy
-Can kill other characters.
-Can steal gold.
-Can view opponent's mission cards.
-Can stop enemy spies form performing actions.
 
Reinforcements
This enables you to spend gold on extra men, which you can deploy at ANY TIME (even in your opponents turn!) They cost a lot and the cards are hard to get, but Reinforcements are awesome!
 
This is my gold. It is from Mused Fable 
For every 10 pieces of gold you have, you must place a spoil token on the board.
If someone captures it they get 10 pieces of your gold. It means that you lose your wealth gradually if attacked, rather then to the last person that wipes you out.
 
The Forts. These are from Lord of the Rings Monopoly (I think).
 
The Cities. These are from a special edition of Monopoly.
 
It was also during this period that the next big change happened. With a whole heap of extra stuff on the board and bigger playing pieces the normal Risk board was becoming too small. So in my typical style I upgraded it!!!
Yet another New Risk Board
 

This ordered this oversized poster online and it came in August 2012. At this point we had been reinventing my Risk game for over two years!
 
This is the original image
 
 
Loads more space!
I started painting on the territory markings but still haven’t finished, and now I am contemplating adding a few extra territories.
 Here I added an extra route into Australasia. We got too sick of the old 'hold up in Australia' tactic. This addition works really well. 
 
I haven't got any really good photos of a proper game set up but here are a few bad photos from one game where we were using the old plastic pieces.
 
In this game the Spanish ruled the waves!
 
Before I made the character pieces we used paper ones to try it out.
 
The new pieces look way better then the little plastic ones!
 
I better stop talking about Risk now (this post is ridiculously long already!!!!)
But one last thing....
 
My pieces were getting very scratched from game wear and storage so I made a display plinth to store them. Here they are:
 
It is handy having magnetised miniatures.


And some French slowly getting painted.
 
Loads of ideas for other nations!
 
 
I hope you have enjoyed the journey. Its been a blast for me :)
 
 
More to come soon!
Comments and questions always welcome. 


On the work bench: A Ceremonial Honour Guard

$
0
0

Life in the Honour Guard: Spend weeks drilling, polishing, yelling, and parading just faint and look like a noob!

The other day I pulled out a few more lasconnons to paint in their tan colour for my ‘122nd Regiment of Praetorian Artillery’. However, before I got stuck in, I came across a set of old cannons with wooden carriage wheels.
I have six lascannon and six autocannons with carriage wheels.
I have had these forever and never done anything with them. I can’t even remember where the wheels came from. The look of the wooden carriage wheels is comply different from those that I had already made so I didn’t know if they had a place in my army. 

But, like I ways do, I came up with an idea! 


What if they were an ‘old fashioned’ ceremonial unit?


Using antiquated equipment polished up fit for a parade ground.  


Never supposed to be deployed to a battlefield.


The sort of unit that would fire the Governor-General’s 21-gun salutes (or “Imperial Salute”).


A ceremonial Honour Guard… that could be a cool unit!


And just like that 'The Veneration Cannons' were born.


In terms of colour and look I could really do anything. After all, real life ceremonial Honour Guards are not anything like their battlefield counter parts! I mean, just check these out:


To be different I swapped all of the gunners for Mordian models. I was planning to cut a few of the heads off anyway. 

A part of me has always wanted to paint some Mordians up like British Artilleryman. 

But I also like the newer Mordian look as well. I say 'newer' because originally in 3rd ed Mordians were painted with both dark blue tunics and trousers, then at some point this was changed to light blue trousers.
In terms of tone and highlighting there are really endless options for blue Mordian tunics....

There are also many historical references for light blue trousers with dark blue jackets/tunics, particularly with early American forces. 


The First test models.

I started with the chap on the far right. The jacket was a little too light so I started the next one with a much darker base colour before highlights. The second from the right was next. I used more of a green-blue colour in the highlight to 'cool' the blue back (like in the above female Mordian picture). Then in the last two (on the left) I left the tunics with lighter shades of the same blue but changed the trouser colour. 

At this point I decided to go back to some basic colour theory. I ALWAYS do this! When I see random coloured models on the net I know not everyone takes the time to think about how their colours interact but mostly rely on whether it 'feels' right or not. A colour wheel makes the job way easier to understand what you are doing and whether you are slightly 'out'.

The basic Mordians were Blue, Red and Yellow, so they form a Triad like this:

Except, when I went back to all of my 3rd Ed guard books with the highlights they actually formed a Split Complementary, closer to this (Blue, Red-Orange, Yellow-Orange):

Adding the Blue-Green trousers makes a Tetrad of Blue-violet, Blue-green,Yellow and Red:

"Really? A blue-violet jacket?" you say.
In this picture you can clearly see that the jacket is a violet tone rather then just blue.

Looking back at the colour wheel you can see that the Tetrad is slightly off balanced (but it still works).
I decided to be a bit different (because I like 'odd') and go with this (Blue-violet, Blue-green, Red-orange, and Yellow-orange) which is very even:

So, how did that look?

Starting with the base colours (don't worry, the yellow will go to orange):

In this picture below, I have my new scheme on the left (Blue-Violet Tunic, Blue-Green Trousers, Red-Orange Piping, and Yellow-Orange Accessories), next to the original Blue, Yellow and Red scheme. 

I though it looked interesting, with the mix of hot colours and cool colours, so I base coated the rest.


 Here is how some of the unfinished men look with the basic colour of the cannons.
I went with a traditional light grey for the carriage and bronze colour for the gun. 

Now digressing to the heads - I said that I wanted to swap a few of them.

I picked up a heap of different heads from the Meridian Miniatuers kickstarter with the intention of using them for head swaps. The thing is that they are a little small for the old 2nd and 3rd ed 'heroic' Mordian figures, so I decided to just use the hats.

Here is the first cut down hat.


 I took the top of the cap off first but it was too high.

So I took more off. 

Still too high so I took some off the bottom of the hat.

and a bit more...

Until I had this. 


I thought this looked OK but the next evening I wasn't happy with it. 
So I started again.
This time I took off the peak of the cap and reshaped the bridge of the nose and eyebrow ridges.


I also left the straight peak on the bottom of the hat so it looked like this:
First attempt on the left, second on the right.

I decided that this looked better so I went back and completely re-did the first gunner.

Here they are with the tunics highlighted.

And here I have added the yellow-orange and red-orange to complete the look

Still lots more to do on these, but the basic colour scheme is all sorted.

When finished, this unit will look 'different' enough to complement my (unusual) command squad well.


Before signing off, I have been following Matthew at Battle Ready Miniatures as he starts building his own Mordian army. I thought I'd point it out because firstly, there are never enough old school Guard blogs out there and secondly, its a cool blog with only 4 other followers. If you are interested drop by and say Gday.

Here is one of his test miniatures and a converted command squad: 


Thanks for dropping by,
Colonel Ackland.

Modelling Goals for the Year - 14 Projects for 2014

$
0
0
It is possibly a bit of wishful thinking but I never work on just one project at a time so I need a spattering of things on the go. You may notice that I have been purposefully vague with the exact number of models on the list. It should make it a bit easier to actually hit each goal.


Smallish projects:


1) Finish off a battery of the Veneration Cannons. -shouldn’t be too hard, they are almost done.


2) Finish off a bellowing of the 105th Praetorian Mechanised Dragoons (the Dragons Breath), and an ambush of the 63rd Praetorian Rifles (the Jagers).


Medium Projects:


3) Praetorian sailors -a watch of sailors, a raft of servitors and chain of officers and bridge staff.


4) Paint up a zeal of commissars.


5) And I’d like to see more red coated Praetorians for the 40th Praetorian Line regiment (Excellers), say… another platoon worth and a party of officers


6) It would be nice to finish a small convoy of tanks of the 10th Armoured Regiment of Praetoria


7) While I’m at it, a few more batteries of cannons wouldn't be a miss for the 122nd Regiment Preatorian Artillery.


8) I have three old original Land Raiders that I would love to strip and re-condition. Not for any force in particular but just for good old nostalgic fun.

9) There are some random Guardsmen lurking on my hobby desk too - an officer needs to sort them out and end their larking about.


10-12) Paint up at least one troop of the 7th Razor-Winged Hussar, Prutenian Iron Horse, and a gaggle of walkers to go with them. Maybe if I’m inspired, a gruff of ogryns too?


The Big Ones:


13) Convert up 50+ cavalry to run as a Rough Rider Army!  I say ‘army’ but it will represent Colonel Ackland’s 3rd Brigade of the Macharian Thunder Guard. I have already worked out the rules for them!


14) Paint up a Nuisance, a Labour or a Murder of Necrons, AND a city (or at least a small colony) of buildings and terrain.  I have wanted to re-build this army for a long while now. It is a cool old school force that will be a deserving nemesis of my Praetorian forces.


So there it is. Loads of awesome hobby time in there!

PS. I have just added a poll on the top left side of my blog. From this list, what would you like to see first? 

Ceremonial Honour Guard WIP - Part 2

$
0
0
In between my other projects I have slowly been making progress on The Veneration Cannons, so welcome back to part 2 of my step by step build. 

Since last post I have done a lot of work cleaning up the gunners. The pants are now highlighted, the gloves, boots and rifle straps are black with grey highlights, and the faces have their base skin tone.

I have also started the rifles slung on their backs. The rifle bodies are meant to be black but with the highlighting they are starting to look a little grey. A wash should bring them darker again though.

Leaving these for a moment, I went to work on the bases. On all of my 60mm based models I like to get most of the base finished and then pin the men to the base. The main reason for this is that I use natural slate and I don't want to get paint onto it.

From other posts you may remember that I use brown-orange slate on my bases. I get this from my parents property in the Willunga hills. Their property sits between two neighbouring slate quarries but unfortunately for them, the slate on my parents property is too crumbly for quarrying. It is however, perfect for me! 

Chunks of it look like this:

I brake it into smaller pieces and then gently split the slate into thin slithers. You can see the layers of the slate here. 


I use a small screwdriver or an old razorblade to separate the layers and I collect any of the small chipped pieces in a box for later use .

Next I glue them onto the bases with super glue. I usually pre-paint the bases light tan but I forgot this time. The tan paint is just in case a small gap is left between my dirt and the slate. 

First three bases:

 Second three bases:

I use a mixture of brown dirt and sand for around the slate. I also collect this from my parents property (and yes, they think it is odd when I take a jar of dirt home after a visit).

Working in small areas at a time, I first put a dab of super glue and sped it with a tooth pick. Then I sprinkling a few small bits of slate, followed by the dirt/sand mixture. Finally, I sprinkle on some very fine ground up bits of slate onto the top. This last step adds the tiny tiny rocks that you can just make out. I find that this bit helps to add a sense of 'scale' the base.


Here are the first three done:

 And the second three:

On to the cannon carriages next! These were painted with two coats of Adeptus Battlegrey and then dry-brushed (generously) with Codex Grey.  


I wanted to pin them to the bases next so I drilled 1mm holes in the wheels.

I positioned them onto the bases and marked the position of the pins. I like to use paperclips as the pins because they are easy to cut and bend.


These two holes fell on a bit of slate and in the dirt. If I drilled through this with my 1mm drill bit it would immediately blunt and break. So instead of a drill bit I use a small piece of copper rod. I squashed the end flat with a pair of pliers. It wears down pretty quick but it is easy to make.

Holes done:

 And all glued into place:

If I am super keen sometimes I slap some Green Stuff around the pins after I trim them back.

 With those all done I started the cannons. I painted the underside of them Brazen Brass and then worked up to the top with all the other GW golds - so the top was bright and the bottom was dull.

Here they are sitting in place. You'll also notice that I have painted the steel parts of the carriages silver (Boltgun Metal and Chainmail highlights):


So that's where I'm up to. I still need to finish the details on the cannons and add a wash. The gunners need their faces done and a tidy up of everything that is left. Then I will carefully cut off their basing tabs (on the bottom) and pin them in next to the cannons. I will probably inadvertently rub some paint off in the process and need to do some final touch ups but it will be way easier then painting them in place. Lastly I will add a few tufts of grass and repaint the rim of the bases black. Their background 'fluff' is on its way, so hopefully the next time you see these they will be done!

Comments are always welcome and feel free to vote (on the top left) on what projects you would like to see me get to next. With so many things on the go I'm not sure where to go from here!

An Army of Rough Riders! - WIP Post

$
0
0
OK, a lot of people have asked to see them so here they are!

It all started with the 1998 3rd Ed Warhammer 40,00 Rule Book.
First of all, this book was great because it included the all of the codex Army Lists. Secondly, there was a real focus on being free to mix up the rules to be as creative as you wanted. With that in mind, at the end of each Army List there was an Appendix containing ways that you could alter the standard list. The Space Marine Appendix included rules for Blood Angles, Dark Angles and Space Wolves. The Eldar Appendix covered Ulthwe, Alaitoc, Saim Hann, Biel-Tan and Iyanden army specific rules. The Ork Appendix includes Kults of Speed, Feral Ork Hordes, Boarboyz and Weirdboyz. And finally, the Imperial Guard Appendix contained rules to field an Armoured Company, Mechanised Infantry Company, Rough Rider Company and Storm Trooper Force (shown below).


The sad thing is that while almost all of the Appendix rules made it into the mainstream game either in its parent codex or with its own specific codex, a few fell by the way side. With the Imperial Guard Appendix rules, Forge World now have an army list for an Armoured Force, Mechanised Infantry first got its own codex (within the Armageddon codex) and then was incorporated into the Guard codex and Storm Trooper forces were made possible in Witch Hunters and Daemon Hunters codices (and later with the Inquisition supplement). Rough Rider forces however, went the way of the Squats! In recent times with the changes to the power weapons rules and the addition of bigger scarier models, only the most daring or fluffy gamers bring their Rough Riders to battle. 

It isn't all doom and gloom though. Recently Forge world have reinvented the sturdy Rough Rider with their Death Rider rules. They currently stand with:  WS 4, Stubborn, Re-roll Dangerous Terrain, 2 Attacks, plus a Hunting Lance AND Close Combat Weapon & Pistol, Krak and Frag Grenades, Feel No Pain, ... and, wait for it ... 2 Wounds - all as standard! All this and now you can take them in Platoons with a Command Squad and Commissar as well.

We currently are on the brink of a new Guard Codex and there have been some rumours of cutting the humble Rough Riders completely. I don't see this as likely but with the new FW rules and a new codex imminent I think now is the time to finally do what I have always wanted to do.... build a Rough Rider Army.

And cue..
Colonel Ackland's 3rd Brigade of
The Macharian Thunder Guard - Veteran Cavalry Division

"I have seen war in all its forms. I have seen feral world savages braining each other with stones, and I have monitored the death of a whole planet at the hands of a virus bomb. I have seen Space Marines drop to certain death, and win. I have seen Titans crush whole platoons underfoot. But there is no more stirring sight in war than the charge of massed cavalry."
— Dravin Gratz, 14th Tharinga Regiment


Background and Theme
I wanted the freedom to make as many different types of units with different uniforms and styles as I wanted, without being constrained to make them all look like one army. So naturally the fluff for these guys have them coming from different regiments. Briefly, when battle hardened cavalry regiments are significantly reduced in strength, rather than be disbanded some are transferred into a Veteran Cavalry Division. This force (The Macharian Thunder Guard) is one such division. Some of the background to the Thunder Guard can be found here. For the overall theme, I have tried to give the riders the same style mount and hunting lance. I think that while differing uniforms are accepted in the division all the equipment should be somewhat standardised. This and the same bases should help to tie them all together. I frequently lean heavily on the style of the 19th century cavalry but I have also add in a few other regiments that I felt really needed to be present.

Rules
The DKoK Siege army list or DKoK Assault Brigade army list form the base list of my force (N.B. FW currently have the DKoK Siege army list as a downloadable PDF). Of course the first change is that all models are mounded on horses and change their unit type from infantry to cavalry.

After my fist game with this army a few things became evident. The Imperial Guard are a force that really excel at standing still and shooting at the enemy. Allowing them to move faster and assault further without adding any protection or fire power turns everything on its head. In order for the list to be anywhere near competitive we needed to add a few extra abilities. The DKoK 2 Wounds and 6+ Feel No Pain works perfectly in the game giving the riders some extra durability without making it silly.  Other special rules that we enjoy adding are Hit and Run, Scout, Preferred Enemy (Infantry) and making Hammer of Wrath attacks Concussive. All this for 6 points extra per model. That doesn't sound like a lot of points for a big advantage but upping a 100 point veteran squad to 160 points is a significant increase. That is more than a Chimera but without the added armour protection, weapons and durability. Without these upgrades you end up having a very expensive list for what is essentially just a normal Guard stat line. In addition,  these special rules really help the units play like real cavalry. For example, seeing cavalry charge in then quickly braking off to reform and charge again is epically fun. Anyway, this isn't meant to be a rule focused post, so I'll leave it to this brief explanation. If you have any specific question please drop me a comment.

Before I get to the photos I'd like to point out that this is obviously a work in progress (WIP) post. The big difference a WIP post has from a 'Finished' post is that you are asking people to look beyond their current status to where they may be when they are finished. So please look past their flaws to see their potential because everything here still needs a lot of work.
:) cheers.


Army HQ
This is Col. Ackland (my pseudonym). I have posted pics of him before and sadly I have made no progress on him since last time he appeared on the blog. Never the less, here he (arr, me) is:


Command Squad
Two Body Guards to lookout for the Colonel.


This old Imperial Army era fellow is carrying an  Aquila standard (it won’t have a flag being reminiscent of a Napoleonic Eagle standard).


Two banner bearers, just because flowing banners look good during a charge. I haven't decided on what heads to give these guys yet.


And a medic, to keep the Colonel kicking around a little longer.


 Storm Troopers / Heavy Dragoons 
(aka Cuitassiers / Dragoon Guard / Household Cavalry / Carabiniers - armed with hotshot Las Carbines)
 Interestingly, in the DKoK Assault Brigade list these guys are Troops instead of Elite.

I try to do five men for each different regiment that I mix into my force. That way they can run as a half squad or I can split them all up into different units. In terms of fluff I would expect that small groups of comrades from one regiment may stick together to represent the few survivors of their old company or regiment. Each unit has a name and background but I’ll post them up when I eventually finish each unit off.


As well as these very ceremonial looking Heavy Dragoons I wanted some 'regular' looking Storm Troopers. I think the idea of a mounted regiment of Storm Troops it pretty cool. 


These next guys are Veteran Death World Cavalry. 


 Veterans / Scouts 
(aka 

Hussars / Chasseurs à cheval / Rangers)

In the DKoK Assault Brigade list these guys are Elites instead of Troops.


"Sound the charge! These traitors are in for a surprise."


— Captain Yonast d'Lancier, 77th Mordian Light Patrol


 Some people might recognise these bodies from an old post.


 Lancers / Death Riders
(aka Chevau Légers / Shock Cavalry) 
These guys are Fast Attack. 

I still need to make a command squad so I can run these in a platoon.


I only have two of these 'Red Lancers'. If anyone has a spare head from the Blandblade or Hellhound kit with this cap that they are willing to part with please let me know :)


Obviously I need to have some Attilans! I have only made one so far but the rest are coming, along with a Captain Mogul Kamir conversion as well.


 Also I couldn't miss the Cadians...


Dragoons
(aka Mounted Rifles / Light Horse)
These are troops.
After my first test game with this army it became obvious that I really needed to add some cheaper troops to the force to add more numbers, soak up hits and take objectives. To do this I have mounted troops that fight on foot (like actual dragoons). Rule wise, they are an infantry platoon that count as cavalry but don't have any of the spacial rules that the other units have and as a consequence are a little cheaper. To model them I have infantry on foot that have their horses next to them on a 30mm base. The great thing with having removal infantry like this is that I can use any models that I want to represent the Dragoons. I'm happy with these horses being a little small then the others as they are not meant to be augmented or genetically modified.

"What is it like to ride into glorious battle atop a noble, loyal steed? If I ever find out, I'll tell you."


— Gellen Kegn, Luggnum Sewer Rats 83rd Aethexe Cavalry


Horse Artillery
Finally, I always wanted to make Horse Artillery – that is, horse drawn cannons. DKoK artillery are perfect for this. Rule wise, all I need to do is add a few extra points. They move like cavalry but obviously need to be stationary to fire.


For the models I will use Curious Constructs heavy weapons. The ‘Tesla Cannons’ will be Rapier Laser Destroyers and the rocket battery will be Quad Launchers. I have extra cannon carriages to use as the lumbers. I haven’t decided whether I will do teams of 2, 4 or 6 horses and I'm also not sure which horses I will use. 


...And that's about it. Loads more work to do but I'm in no rush. This is a slow burn project that will take a while to get together. Still, I'd like to get these all ready for some paint some time soon.

In the real world things are pretty hectic at them moment but I'm hoping that in a month or two I might be able to tee up a game with Frothing Muppet and test these guys out again. Then they should be ready to take to the field at the new local club that we have found.

Thanks for checking them out. Feel free to post any comments below.

Celebrating 50,000 Hits

$
0
0

Evening Gents. I'm just kicking back with a cool drink on a sweltering 43 degree day looking over the crazy number of visitors that have stopped by my little blog this week.

Over the last two and a half years my hit counter has slowly risen in small increments. I try to blog regularly but usually one post a month is all that eventuates from my sporadic hobby time. As a result, this is only the 67 post on my little blog while other blogs of the same age are at well over 100 posts. Never the less, I noticed last week that I was only a couple of thousand hits from the 50k mark and I thought to myself "That will be a nice milestone to hit in 2 or 3 months time". I'm surprised to say however, I completely underestimated how many people would be interesting in checking out the cavalry! In a week my Rough Rider Army post has clocked over 4500 views which is about 10 times more then I expected it to be seen in a month. The result is that I have absolutely smashed past the 50,000 hit mark by several thousand.


At this milestone I'd like to give a massive 'thank you' to all of the readers that drop by my blog, my 92 public followers, and particularly the regulars that frequently comment on my posts. It is really motivating to hear that someone has enjoyed seeing something that I have been working on. I'd also like to thanks Col. Gravis for encouraging me to start this blog in the first place. Before that time my hobby was becoming a very solitary pursuit. Finally, I would like to thank all of the authors to the many blogs that I follow. I am continuously inspired by your skill, enthusiasm, and dedication to this hobby.


Before ending this post, I have recently discovered a few things about myself which does explain my hobby habits...
I was thinking about why I have blogged such few posts and I was imminently reminded of my first blog post where I wrote:
"As well as being fanatically involved in WH40k I am trying to finish up my PhD. So I guess my blogging will be sporadic until March 2012 when I get to call myself doctor and have way more time to paint, game and blog."

Well, in about March 2014 my PhD thesis IS finally being submitted. There are very good reasons why this has taken so much longer than expected but I do need to concede that I am a bit of a 'creative type' and accordingly something overlook deadlines (because I'm too caught up in my work). I also tend to think too big and I don't always finish projects - although I always do come back to them. This pattern also spills over into my hobby time which is very apparent from this blog. Examples include my slightly ridiculous Risk Set, my extremely excessive Praetorian Army, my overly elaborate Hobby Desk and recently, my rather ambitious Rough Rider Army.

To sign off, I have a heap of (rather horrible) snapshots from over the last 15 odd years of my gaming (it is hard not to laugh at the old photos).


Thanks again everyone!

For Sale: Praetorian Guard Limited Edition Box Set

$
0
0

A good fellow here in Oz by the name of Michael has a mate with a shed full of very old miniatures. I have brought things from him before and he is very reliable. Currently he is parting with a full Praetorian Guard Limited Edition Box set.

I don't have what I think it is worth and I think he could get more then what he has been offered. So I have asked him to hold off on accepting an offer for a day or two so I can opening it up to you, my fellow Praetorian Commanders!

It comes complete with:
Praetorian Captain
Commissar
Praetorian Standard Bearer,
Praetorian Bugler
3 Praetorian Special Weapon Guardsmen,
2 Praetorian Sergeants
5 Praetorian Heavy Weapons Teams
13 Praetorian Guardsmen
The Praetorian booklet
The Praetorian decal sheet
2 limited edition Praetorian casualty miniatures.

The box isn't sealed but all the miniatures are still in their blister packs. 
The box is slightly bent but otherwise in good nick.

As he said "The box has a tiny tear maybe 1 cm on the bottom right corner of sleeve. Decal sheet has yellowed on one edge.  Otherwise all in blister as new. I personally checked they were all there"

We are in Australia but Michael only charges actual postage cost. I'm sure he could get you a postage quote as well.
Make him an offer quick!!!

Send Michael a face book message or email me (my address is on my blogger profile).

https://www.facebook.com/michael.wright.5076


The Confrontation of Tartarus Tor: A farewell to 5th ed Imperial Guard

$
0
0


With the new Guard codex on the horizon, it was with much glee that I managed to squeeze in one final battle with the rule set that has been my 40k life blood for the last 5 years (since May 2009!!).  At the beginning of March I dispatch an invite to a small coterie of 40k heroes for a two on two, 4000 point a side battle at my place.  This party of heroes comprised of my regular opponent James and his Space Marines, fellow blogger Liam (Muppet) with his Guard and Ultramarines, Dale joined by his Space Wolfs, and me (Ray aka Col. Ackland, aka The Beard) leading my Guard. Seeing that James and I had played against eachother many times I teamed up with him for this one.


Over the month, while we taunted eachother on Facebook, James and I secretly honed our two lists and we planned and planned and planned. One night I sat with James at his diningroom table surrounded by codices and lists talking strategy for hours. It felt like doing homework at a friend’s house – and boy we really did our ‘homework’ on those lists! In the words of Sun Tzu “every battle is won before it is ever fought”. This morning, before the battle, when Dale said to Liam “So what are you taking?” we both released that our opponents would be relying on their martial skills rather than careful planning.

Our Strategy 
Our plan consisted of having a well dug in defensive position and a fast, hard hitting vanguard force. We'd use the defensive position to hide/protect our Warlords and fill it with big guns to pound the enemy in the first few turns. 

Expecting that the defensive position would draw incoming pods and deepstriking units we added an Icarus lascannon, a quad autocannon and also Inquisitor Cotez. He would allow the squad that he joined to get a free out of turn shot at anything that dropped in within 12". The core of the defensive position was it's big guns; two Manticores, two Earthshakers and three Heavy Mortars, protected by defence lines, two blobs of 30 guardsmen, a hand full of Space Marines, an Inquisitor with conversion beamer, lots of Guard officers, two Guard lascannon teams and two squads of Guard melta vets on each flank. 

The vanguard force was decked out with six Land Speeders (with melta, flamer and heavy bolter combinations), three melta Attack Bikes,  two flame and melta Dreadnoughts in pods, two Vindicators, and two Chimerias with five Inquisitional Psykers each (both delivering a nice S7 AP2 5" blast). To boost all of these flamers and meltas, James took Vulkan as his Warlord allowing  his Space Marines 'Salamanders' lots of re-rolls.

For anti air we had the defence line guns and we also added a Vendetta for good measure. Finally, with the points that were left we through in two 5 man squads of Scout Snipers, 5 Ratings, and 3 Inquisitional Servo Skulls to direct artillery and pods, coming to a nice 2000 points each.

To win victory points, our plan was to have the artillery attempt to take out both enemy Warlords. The vanguard force would hit hard and deep into their lines so if they survived they would take Line Breaker. We'd try and get first turn or use Cortez's ability to re-roll to Seize the Initiative to have our best chances at First Blood. Early in the game the focus would be on destroying the enemy and late in the game would be to move on one or two of the objectives.


The Story
-This has built over many many battles now. Some have been blogged about while others haven't.

Previously: Commissar-General Marwood (and an understrength regiment of Teutons) ended up on the plant (HD85512) mostly by accident. James’s Space Marines attacked them with no initial reason given. The Marines had been standing sentinel over the planet for some time and apparently had a really good reason not to let anyone be there.

One damaged frigate escaped and got word back to Segmentum Command about the attack. Bakka was worried that these apparent ‘rebel’ Space Marines would use the planet as a staging ground to attack a major shipping rout to Bakka, so a Praetorian Guard force was dispatched. They rescued the Commissar-General and had several well fought punch-ups with the Marines.

Things got interesting when Col. Ackland led a cavalry charge against the Space Marines while they were moving a ‘relic’. Initially they failed to retrieve the relic but later the cavalry uncovered what looked like entrances to an underground structure and two artefacts; broken golden automata both in the aspect of large winged insects. After news of this reached Segmentum Command it seemed they were concerned.  They ordered Commissar-General Marwood and a small group of Praetorians to take the objects off world and find a certain Inquisitor and Magos Xenologist who apparently would know what they were.


In an early exploration of the planet, possible deep underground structures had been noted.  Elsewhere in the Segmentum this had been a sign of a terrifying new treat to the Imperium. Hence, a large relief force of Imperial Guard and Space Marines (Dale and Liam’s forces) were also sent to take control of the planet and investigate these possible structures.


But just as they arrive things take an unexpected turn….

In one of the previous battles with (James’) Marines a Psyker Primaris named Azzopardi, dropped into a coma mid-battle suffering ‘Perils of the Warp’ (I rolled double 1's twice!). During this psychic concussion, uncontrolled warp energy surges through the Psykers mind, driving him to the brink of insanity. He saw glimpses of possible futures. Dark horrible futures. Now, by the Emperor’s Holy Will he fought back and regained his consensus. He beseeched the Praetorian Commander not to let anyone journey beneath the surface lest they wake the sleeping doom that resided there.


The commanders of the relief force (a Cadian Major, Ultramarines Chaplin and Space Wolves Rune Priest) were more concerned with following orders from Bakka then the crazy ranting’s of a burnt-out psyker. To the Praetorians however, Azzopardi was glorified to be a ‘divine soul’ having stood against the might of the warp and remained true to the Holy Emperor. In a further twist an Inquisitor had mysteriously reviled herself and pulled the ‘renegade Marines’ back into line. These ‘other’ Marines were also adamant that no one could enter the underground structures.


Although peace had finally been won, Major-General Sigenandus was unable to maintain control over all of the Imperial forces on the planet. At Tartarus Tor, the location of the supposed access points to the subterranean structures, two forces faced off.  Azzopardi aka ‘The Psyker Saint’ and the Inquisitor had deployed on the east side of the hill, while the relief force was to the west. The relief force moved in and preemptively fired the first shot…

The pre-game board set up
A nice big 5 by 9 foot battlefield. 


Out post 306 and the hill 'Tartarus Tor' running across the centre.

The two blue hatchways are the objectives, representing the access points to the subterranean structures. 


Extra tables for food, drink, rules and casualties.


The Battle bigins!

While I was expecting to deploy along the long edges we rolled up the short end deployment format. I then foolishly said 24” deployment zones forgetting that there was still 3 feet between us. It gave a cinematic battle but the distance was a bit too far. 


A horribly blurry shot of our lines…


Deploying that much artillery, behind loads of men and defence lines, way back in the corner of the board earned me the nickname of ‘The Beard’ for my absolute beardy play. 

Me with my 'Beardy' face on! (photo from Liam's Blog post).
Liam ready to fire.


James looks on with concern.


The ‘rat-a-tat’ of Autocannons.


James must deal with some uninvited Ultramarines in turn one.


Meanwhile James unleashes hell with his own drop pod dreadnoughts (the two on the right). Dale’s space wolf dreadnought (on the left) rounds the pod for some dreadnought on dreadnought action.
Burning Cadians! Somehow first blood wasn't awarded until turn 3!!


Cadians advance on the other flak. First their platoon HQ and then their company HQ are blown to pieces by artillery fire. 
At this point Dale and Liam have 3 VP’s for holding an objective while James and I only have 2 VP’s (Slay the Warlord and First Blood). Do they really think the game will be theirs??


My vendetta came on to the sound of “Flight of the Valkyries” playing in the background.


Turn 3 (by the number of Manticore rockets fired). The Guard had gunned down what seemed like hundreds of deepstriking Space Wolf Terminators at point blank range. 


Turn 4. Time to jump from cover and run at the objective (while the '1812 overture' played in the background).


Two Space Wolves get the jump of a group of Scouts while a lone Thunder Wolf leaps over the wall looking for an easy meal.


The lines are thinning


Space Wolf Devastators overlooking the battle from a perfect firing position.


Cadians holding the objective while Ultramarines march forward on foot to meet their doom.

Liam and I shoot each other with cameras.


End of game.


Liam gives me the finger, concerned that I'm taking a photo of his... crotch area
(or, as we were calling them on the day: "dick shots").

Our plan worked pretty well. I killed Liams Warlord and we scored First Blood then moved on one of the objectives late in the game. Liam and Dale were still holding their objective so the score was 5 to 3 our way.

Looking Back
The day was a ripper! I had the sound tracks to Ultramarines the movie, Space Marine the game and Dawn of War the game playing in the background to set the scene. Also on another stereo I had a loop of battlefield effect playing. I made it up especially for this game with loads of explosions, gun fine, rumble of tanks, sci-fi laser guns, whooshing drop pods and even the odd chainsaw - arr, chain sword. With loads of beer, nibbles, pizza and joking around it was our hobby the way it should be played. A chilled out backyard battle on a 30 degree Sunday in the suburbs - perfect. 

What it means for the story...
The 'Relief Force' took one entrance and the 'Original Force' took the other so I guess this battle may continue at some later stage down beneath the surface. I wonder what they will find down there??

Cheers for checking out our battle. 


Be sure to pop over to Muppets blog where he has some way better photos of our battle too!

Taurox Conversion: Lowering ya ride, part 1

$
0
0
Knowing that new Guard goodies were on their way I started putting a fund together so I could join in on the Guard loving. Selling a Tau codex and Warhammer Fantasy rulebook ensured that I would have some new toys to play with on release day. 

This morning the new Scions and Taurox hit the stores. Our local GW man, Dion at Warradale, had told me that he only got three Taurox kits in and many people were after are ALL of them. My response was a sarcastic dig at GW as usual. "Three at your store? I was expecting GW to send out a total of three to all of Australia - they must be getting generous these days!"
I set my alarm and got down there at 0800 to make sure I didn't miss out. Being first in line, I managed to grab a Taurox, Scion box and I also pre-ordered the new Guard codex for next week.

On to the Taurox! 
When I first saw the Taurox I thought it was a little 'aesthetically challenged'. Since then it has grown on me but there is still something odd about its proportions. I'd like to get one into my workshop and lower it!


This is what I had in mind: 


-Lowering it by cutting down the front treads and raise the back treads. I think it is as 'sleek' as the ugly transporter will get.

This picture log will remind me of my steps if I decide to tackle another one or three, but also someone out there might like to have a go themselves (or more likely improve on my attempt).

Starting with the front end... cutting down the tracks.
Bottom cut.
Setting up the the top cut.
Top cut done.
One side done.
Both sides done :) 
Normally the shaft slots into the inside of the track like this.


 On my cut-down version I had to trim the insert down to fit.


Tacked together you can see the 8mm gap between the top guard and where the track will be.

To bring the track up I cut out the gearbox.

And cut down the edges of the shafts (the long bit on the sides).
Here is is sitting in place.


Before building the tracks I cut off this inner lip, so the tack links would fit in behind the track guard.
Here are the tracks glued together.
The tracks now sit at about the right hight from the guard above.


 That's the front half done!

Comparing back to my original plan it looks about right. 

I'd still like to tidy the detail up with some green stuff but now on to the back section....

Taurox Conversion: Lowering ya ride, part 2

$
0
0
This is a pictorial log of my attempt to lower a Taurox and in doing so improve the overall look of the model (if that is possible). If you haven't checked out Part One,  please do so here.

As a refresher, the dodgy photo-shopped image on the left is my target and the original is on the right.   

In part one I tackled the fount tracks and now I was up to the back tracks. I wanted to raise these higher so they were in line with my cut down front tracks. To start with I cut the back 'gear box' section out (as I did on the front).


On to the side panels...
This is how the side panel looks normally.
I was going to have to cut this guard off to so the tracks could sit higher.
Looking form the inside
And all cut!
Next I needed to cut out part of the side panel to remount the guard higher up.
Here it is blue tacked in place.
The distance between the track and guard looked about right.
Looking from the inside.
The other side done.
I needed to fill in the gap so I cut two pieces of plastic sheet to the right shape. It was a tough call whether to mount the sheet on the inside or outside. In the end I decided on the outside because they would be hidden by the tacks. This meant I didn't cover up the inside detail as well. 


With the sheet cut and glued the rest of the build was pretty standard. 

Here it is partly built. Most of the parts are just sitting in place so that I could see the overall shape of my new look Taurox.
It still needs all its guns, accessories and turret/missals rack.
The track haven't been glued in which is why they are sitting crooked. 
Checking against my photo-shopped plans, I have managed to come pretty close.


And the originals to judge the difference:

There is obviously still more to do on it but that is the basic build and conversion work done! 

Thoughts?

Teuton Scions and Taurox WIP

$
0
0

After starting my Taurox conversion yesterday (found here in Part 1 and Part 2), today I pulled out the Scion kit. Since I first saw them I have been dying to put Curious Construct Pickelhaube heads on them.  In my mind the baroque armour was crying out for a bit of 18th century Prussia! 

To make them look a bit more special I replaced the helmet spikes with bigger ones and made helmet plumes out of copper electrical wire. I had done this before with my Praetorian Rough Riders (a step by step making the plumes is here). This was roughly what I had in mind:
Just look at the size of that spike!
 Here is how they tuned out:

We have been told that Col. Gravis is working an another head especially for this kit. I'll be quite happy to have some with a different helmet to mix things up down the track.

The scion kit is really nice in the flesh. You do have to be cartful not to mix up the bits because each Hotshot lasgun will only fit one set of arms and one backpack. It was a bit fiddly lining up both hands on the arms and the power cable too, but that is all part of the fun. I liked the extra bits of equipment in the kit - the little Imperial Handbook is a nice touch. One odd thing though, there are enough Krak and Frag grenades to deck out the whole squad but in the new rules only the Tempestor is equipped with them. Its a shame when the rules and the kits don't line up. 

I also made some more progress on my converted Taurox today. 
Here it is next to a Banewolf to gauge the scale.
If you are planning to build one of these yourself and would like to paint the interior, I stumbled on a handy tip. If you don't glue down the floor and bonnet they easily slide out to paint - even with the rest of the kit built.
Driver in place.
Floor and Bonnet section unglued so I can paint it. Check out the detail.
Here it is again slotted into place.
The back area. You can see where I raised the the track guard (the white bit under the seat).  I will add some greenstuff to clean it up a little.  
The gunner seat can be positioned at floor hight or raised to look out the turret.
I raised my gunner as high as I could. 
At this point I realised I had a problem. My nice Pickelhaube spike was too high and hit the roof!

It stuck out quite a bit!
I really wanted to keep the spike because  planned to have a removable roof and painted interior. After a bit of thought I decided that this part of the roof was under the turret so wouldn't be seen. So I made space for the spike and it fit perfectly under the turret.

One thing that bugged me with this kit was there was no Heavy Stubber included! Why give me loads of extra stuff that I don't need (like two sledgehammers and other tools) but leave out a crucial upgrade like a heavy stubber! In fact ALL of the Optional Vehicle Equipment is missing.

No: Seachlight, Dozerblade, Heavy Stubber, Smoke Launchers, or HK missile!

Anyway I had to go and raid another kit to find a Heavy Stubber. There was nowhere for it to fit well, so I mounted it in the turret view port. It happened to line up with my gunners hands quite nicely.


It doesn't look like it will be hard to build it with interchangeable guns, just the odd magnet here and there. There is still more to add to this but I feel like it is almost there!

Finally, here is the group all together.

And alongside my Teutons (or as I call them Prutenians - which is a latinisation of 'Prussian') 
The Taurox will get a set of hussar wings to match the other vehicles in this army.
I'm looking forward to getting these all painted in a batch before I move on to something else!

Building a Necron Empire of Gold -Episode 1: The Concept

$
0
0
First off, sorry blogging world for not being around much. There has been some tough times with my father-in-law battling cancer right at a time when work/study has been totally crazy. Life gets like that sometimes. Thank you for my Lobster Awards, unfortunately I just wasn't in the head space to put a post together.

Since my last post I have found a few more followers bring me over the 100 mark which is something that I thought my little blog would never achieve. So cheers to the newcomers! I have had a lot of interest in my Taurox and Scion conversion, and rest assured they will be the focus of an upcoming post soon. Now that I have a free moment, I'd like to share a project (over a few posts) that is actually turning out to be pretty cool.

I have had this slow burn project quietly progressing on the sidelines of my other modelling for some time now. It has moved forward so sporadically that I never felt the need to shed the spot light on it for a blog post. This has resulted in having what is now a relatively big project that hasn't been blogged about! So in typical Ackland style, hold on to your hats, this is going to be quite a ride.

The whole thing started because of my Praetorian army. While I have dabbled with almost every other army in 40k, (most of which are boxed up in my shed somewhere) the Praetorians are the one force that I have always come back to, time and time again.
Most of my terrain matches the army and what I have finished looks good on the board. But there was one more thing I wanted to add to the collection to make it feel complete: a nemesis force.
Nemesis: The Greek goddess/spirit of divine retribution, with a name meaning "to give what is due".
To my mind, every heroic character needs a arch-enemy and every intrepid army needs a worthy adversary. We love to consider the Patton vs Rommel match offs and where would Hannibal and his Carthaginians be without their Roman counterparts?
I have a feeling Miss Carthage will win this one.
We see it in the 40k fluff too with characters like Commissar Sebastian Yarrick verses Warlord Ghazghkull Mag Uruk Thraka.
Can we even contemplat the Armegeddon Steel Legion without thinking about a mighty Ork WAAAGH to fight off? 
The truth is that war is all about adversaries; who has been pitted against who. So my Praetorians need a worthy advisory to complete their look and feel. Where are they campaigning and who are they campaigning against?

An obvious choice would have been Orks, but I felt that that had been done.
Dark Eldar were another contender with references to ongoing raids in the official fluff, but it wasn't an army that I wanted to build. The Dark Eldar have a bit to much sadomasochism going on plus some seem to remind me of Bowie for some reason.

I considered Chaos as I have the models and they are a natural arch-enemy to the Imperium... 
I have a box of old Death Guard waiting for me to be inspired to do something with.
But there was one other army that I had packed away that I love almost as much as my Praetorians. That is my 2nd ed Necron army. 
Some of the goodies that were tucked away in my shed.
'Fear of the unknown' was a big part of the original Necron Raiders.
These guys 'fit' really well against the old Praetorians. Both armies were released together in White Dwarf 217 and 218 over Jan and Feb 1997 and as such, both are full of that 2nd and 3rd ed 40k feel. The more I thought about it the more I was fixed on the decision. 
It would be Redcoats Vs Space Robots!
White Dwarf 217 from January 1997 featured the release of both Necron Raiders (page 27) and Praetorians (page 60) . 

Check out the T5, 2+ Saves in the stat line - 
Rick Priestley pegged the Necron Raiders as brutal opponents!

So who and what are these Necrons going to be?
There are a few concepts that I really like about the Necron persona. I love the 'ancient' society image that they have.  I really want to incorporate that and balance it off with the 'British Imperial power' personality of the Praetorian Guard.
This painting, called Monuments of Egypt by Charles-Louis-Fleury Panckoucke, encapsulates exactly what I had in mind. The first thing that you are drawn to is the spender and treasure of the ancient Egyptian world - once a rich mighty world power. Then in the center there is the new world power of Napoleon's French soldiers, who invaded in July 1798. I'd expect the French army would get quite a shock if an army of mummies suddenly rose from their tombs to defend their treasure! For my purposes, swap the Napoleonic French for pith helmeted Redcoats and Egyptians for Necrons and my mental blue print is starting to take form. A similar analogy is that of the Spanish Conquistadors and the many rich South American nations that they plundered and destroyed.

Ancient Egyptians are pretty much exactly what Necron Raiders originally were.
The three above pictures are from White Dwarf 220 -April 1997, showing Necron terrain modeled by GW's Dave Andrews, Owen Branham and Mark Jones. 
The above picture has appeared in a few places over the years. Here, I took this picture and the one below it from the 2001 Chapter Approved - Second Book of Astronomicon.

At this point I am reminded of a fellow bloggers post about creating fluff, and as Kieran (from Do You Have A Flag?) put it "Be a little different"(on a tangent another good post about in game fluff is here at the Palladian Guard). The truth is that I didn't just want to make Egyptian Necrons. I wanted the guise of the ancient world without being exactly or solely Egyptian. What I really wanted to do was incorporate several ancient cultures and play off the character of 'ancient alien' conspiracies. Cue the crazy hair guy (Giorgio A. Tsoukalos, one of the hosts of the History Channel's 'Ancient Aliens'):

And all of these types of ideas:


Distilling this down, the idea that I wanted to draw on was the thought that at some point in human history ancient man had contact with aliens. That contact influenced the culture, writing, language and architecture of Earth's (or in this case Terra's) ancient societies. Then in the future when Man (the Imperium) comes across an alien world, many of its characteristics resemble that of our ancient cities. Not to be a caricature of something human (like Space Wolves are to Viking and Celtic warriors, Ultramarines are to Romans, Praetorians are to British redcoats etc.) but implying that they are literally the same by causation. The 40k fluff does this in places too, like the linking of  the current world to that during the unification wars by using place names similar to current ones (ie. Britonnica (British Isles), Europa (South Central Europe), Franc (France), Gyptus (Egypt), Merica (North America). When they write Merica they don't mean a place 'like' today's America, they mean America in the future.

This will become clearer in my background fluff but basically in terms of time frame, from our current time go forward 40k years you have the Imperiam and Space Marines, go back 45k years and there is an ancient (now forgotten) alien race influencing life on Terra.

Another aspect that I want to include is GOLD. Gold commonly comes up in many many ancient alien theories too. Egyptians believed gold was divine and a connection with the stars, as did the ancient Sumerians and various South American, Asian and African cultures. The Incas had 'Paititi' the "City of Gold" and the Muiscans (Native Colombians) had El Dorado  "The Golden One". The Incas described gold as the sweat of the sun, while the Egyptians described it as the flesh of the Gods. A translation of Sumerian cuneiform tablets supposedly describes aliens coming to earth to mine for gold. Another wild theory is that aliens built the Pyramids of Giza as a nuclear reactor to make gold. And the theories go on and on....

My point is that if I am going to include ancient alien theories in my fluff, gold needs to be a prominent part in some way! For Necrons, considering the properties of gold (being inert, heat resistant and a strong conductor) it shouldn't be too hard to explain a connection between space robots and gold. 

Beyond the fluff, how does this translate to this project?
A big part of this project is going to be the terrain, which will resemble several ancient cultures and as I said above, gold. There will be lots of gold!

From Egyptian architecture I'l like to include brightly colored painted pillars, pylons, obelisks and the sense of a monolithic and megalithic city.

From ancient Middle Eastern architecture I want to focus heavily on Babylon and Nineveh with big wall, violet and gold colours and a giant ziggurat!

 I also wanted to include ancient alien Atlantis ideas too, with circles of land and water.


The South American influence is gold and bright colors and maybe a stepped pyramid, but mostly a big ancient monolithic city complex.

So essentially it will be an ancient Egyptian and Sumerian like city, paved in gold like a mythical South American lost city but laid out with Atlantis-like rings of water. This golden city is invaded by late 19th century sci-fi 'Redcoats' eager for wealth and new worlds to colonize. Except, in doing so they wake legions of ancient soulless golden robot aliens which may very well massacre them all and go on to destroy the entire sector as they reinstate their ancient empire!

For the colour scheme of the miniatures I have chosen a yellow-gold (obviously) and a complimentary deep blue like that of ancient Assyrian cities.
For the colour of the gold I will be aiming for more a C3PO 'yellow-gold' rather than the 'orange-gold' of the 'teal' Nihilakh Dynasty Necrons (below). It is a subtle difference in the tone of the gold, but obvious when looking at the colour wheel. 

I'm also going to mix up the Necron script (writing) taking the old original 2nd ed style (like the Lord below) over the newer 4th ed script.
Interestingly, this is very reminiscent of the script used in the Star Wars concept artwork. It is Sci-fi with an ancient vibe to it (but I can't pick what culture it reminds me of?- Its not quite Incan or Mayan).


That is the bones of my concept for this project. Work has started on a temple, a massive obelisk, an epic ziggurat, some ruins and a hand-full of Necron Warriors. Now that you have a grips into how I envision them all I'll start posting up the work-in-progress shots, which are far more interesting then all this concept stuff! I also have the background fluff written out too. It's a pretty crazy story.

Thanks for stopping by. :)

Building a Necron Empire of Gold -Episode 2: Working From the Ground Up!

$
0
0
This project seems to be progressing faster then I can blog about it. For those that are just seeing this, it is best to start at the beginning. In Episode 1: The Concept I explained how this project came about and my thoughts on how I wanted it to end up. Keeping to the core concept is going to be really important to get the look and feel that I am aiming for. I think my brief summery of the project was an "Ancient Egyptian and Sumerian like city, paved in gold like a mythical South American lost city but laid out with Atlantis-like rings of water" or there about. I have started various structures (as you can see from the title photo) and here is where each of them are currently at.

The Temple
This is going to be an Egyptian style temple that is painted gold with bright pillars.These were the sorts of inspiration images that I had in mind: 
 

To fit the theme, Bruce Hirst's Egyptian temple mould was exactly what I wanted. And lucky for me I had this mold sitting in my shed waiting for me to do something with! 


Here are the silicon moulds that I used. Mould 94 (the top one) would make the structure and mould 99 (below) would add extra bits of detail. 

I usually use Gedeo Hard Plaster but when I ran out I picked up some Reno Art Plaster from the local craft store. It was horrible stuff. Despite how I mixed it the blocks came out soft and crumbly. The lady at the craft store ordered me in some more hard plaster and after a weeks delay I was back casting away.
Here are some of my blocks drying. For those interested I use the 'wet water' method that Bruce explains in his advanced casting section. It's pretty simple and easy to tackle even for a novice caster.


With the first lot of blocks cast I wanted to find an easy way to get a nice smooth and even coat of gold on my terrain. I don't have a decent air gun so I opted for a can of model spray paint. 
Here is the first walls sprayed gold.
And here is a practice colour scheme. I still want to give it a heavy wash to darken the recesses. Remember also that I wasn't going for an historical look, but I wanted a gold structure with bright colours to go with my gold Necrons.

I drew up a rough sketch of the layout of the temple. In the centre I wanted to add a raised altar with the original Necron symbol on it. The altar will lift out to reveal a set of stairs that lead to a tomb deep under the temple. 
I cut the base out of foam card in 4 separate pieces. Two were 10mm smaller. I cut steps into one of the big pieces and one of the smaller pieces so when stacked they formed four steps up the sides.
I wanted to give the base some texture but wasn't sure what to do. Seeing that I had the left over Reno plaster I thought I'd mix some up and pour it over the base.
It was a bad move! I accidentally got bits of dried plater in the mix which was already very lumpy. At the time I thought it would be fine and add some nice texture. In hindsight I wish I hadn't.
After it dried I gave it a heavy sanding back. 
At least now it was flat with a stone like texture to it.
Being that the plaster was cheap and chalky I needed to seal it before painting it. To do this I gave it a coat of PVA glue.
After it dried I spayed it with the gold paint and then ran groves into it to look like square slabs. While doing this the glue lifted in a few places, so I pealed a few squares off.
Then I gave it another coat of gold paint.

That is pretty much where I am up to on the temple. I still need to cast more blocks to build the back half and finalise the colour scheme but it is starting to take shape.

The Obelisk
To keep with the theme I wanted to add a massive obelisk too. 
It took me a bit of googling and math to get the hight and angles right.

Sketched out on foam card.


All cut and glued together.

I wanted to try plaster on this as well, but I decided to be more careful this time. Here is the first coat, which I will sand and then give a second coat after.

The Ziggurat
Moveing away form the Egytion structures, I really really wanted to make a mighty ziggurat to count as a FW Necron Tomb Citadel. Not sure what I mean when I say ziggurat? This is what I had in mind:
(The Neo-Sumerian Ziggurat of Ur near Nasiriyah, in present-day Iraq)


After a bit of sketching I began cutting my foam board sheets.  
I joined them with PVA glue and pins.


The inner-layer done.


and the outer-layer on with the first floor sitting on the inner-layer.
Next up, stairs. Lots of stairs!


I played around with a few ideas for the small temple on the front but haven't completely worked it out yet.

Early on I toyed with the idea of putting the temple on the top of the ziggurat. I now have scratched that idea in favour of building another two levels and leaving the temple as a separate terrain piece. 

After the basic first level I began texturing the 2 foot square foam base. I cut rectangle block shapes into the foam with a knife and then plastered over the top with Das clay.


Here is the upper level drying with the ziggurat sitting in place. (In this photo I was also trying to work out a way of getting the models to stand on the steps).

At this point I was thinking about how I wanted to texture the walls of the ziggurat. Plaster and clay was a little annoying so I thought about just cutting groves into the foam board. I tried it out on an off cut first and thought it looked pretty easy.
The brick work drawn on (above) and cut with a razor blade (below).
Since this photo I have finished off 'bricking' the rest of the walls and first floor.

Thinking about the Cityscape
With the first structures all taking form I began to plan ahead (as I always do) and think about the city layout. As I said in my last post, I want some arched or circular canals to run through the city. I could either cut up a spare Dead Fleet seascape or paint my own water.


I have an old table tennis table to build my city on. Here I am trying out a few city layouts that I had sketched. I'm not 100% settled on the final design yet. I still want to add a few more building and see how it looks together.


A Murder of Immortals 
I didn't want to get too far on the building without having a few models to match them. So while all this was going on, a few squads of Immortals have been started.

On the idea of gold Necrons- back in 2001 when the monolith was released I remember seeing these gold Necrons in the WD and saying "If I ever paint my Necrons I'm gonna do them in gold."
Later, I actually painted mine in various shades of blue and grey, but now funny enough, I'm going back to my original plan! 

Now that I knew that the Ziggurat floors would be brick I made some bases to match it. These are Das clay pressed onto normal bases then roughly sculpted by hand. After they dried I trimmed the edges and sanded the tops.
After they had dried.
All trimmed and sanded. 

Here is a Necron sprayed gold.
These 2nd ed Necron Warriors will use the rules of Immoratals. They are so much bulkier then the normal Warriors that they can easily justify the 3+ Armour save. I am saddened by the rule creeping that has slowly eroded their once terrifying sate line: Toughness 5 with a 2+ save and 'self repair' (I'll be back) was awesome and brutal. At lest the Immortals 3+ save and strong fire power goes some of the way to keep their lethal image intact. While on the topic of rules I will be running these under the FW Imperial Armour 12 (The Fall of Orpheus) rules. For an extra point they get Flensing Scarabs which gives them the Shred special rule in the first round of combat (once per game). 'Kutlakh The World Killer' is a nice character as well!

I am batch painting the models in one go. The ones below will eventually get a heap of inks over them to shade in the recesses. Anyway here is where they are at.
My Overlord originally had a resurrection orb (above) but I wanted him to count as 'Kutlakh The World Killer' so I pulled the arm off and replaced it with a Tomb Kings sword. This meant I had to carefully tape up all the parts that I had painted to spray the arm gold again (bellow).
Here Kutlakh has his new sword.

I painted the shoulder pads with a coat of Hawk Turquoise then after it had dried painted a second coat of a mix of Liche Purple, Ultramarines Blue and Regal Blue. Then I dabbed it lightly with a tissue so the Turquoise showed though in small blotches.

Finally, I have also been working on some scatter terrain...


Summery of where I am at:

This afternoon I was in the shed making more progress. But that will have to wait until the next post now!

Thanks for checking out what I have been up to! :)

Building a Necron Empire of Gold -Episode 3: Builders down tool and up weapons!

$
0
0
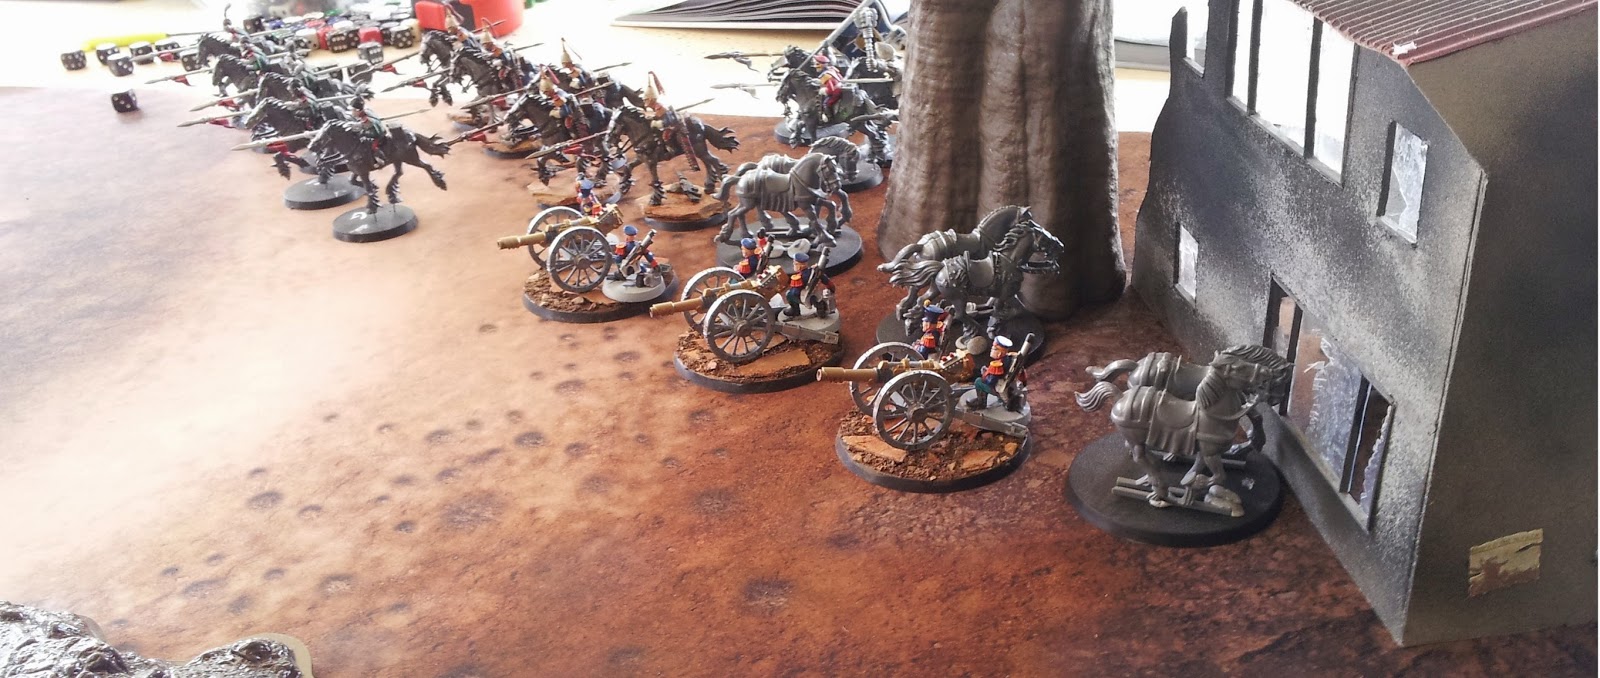
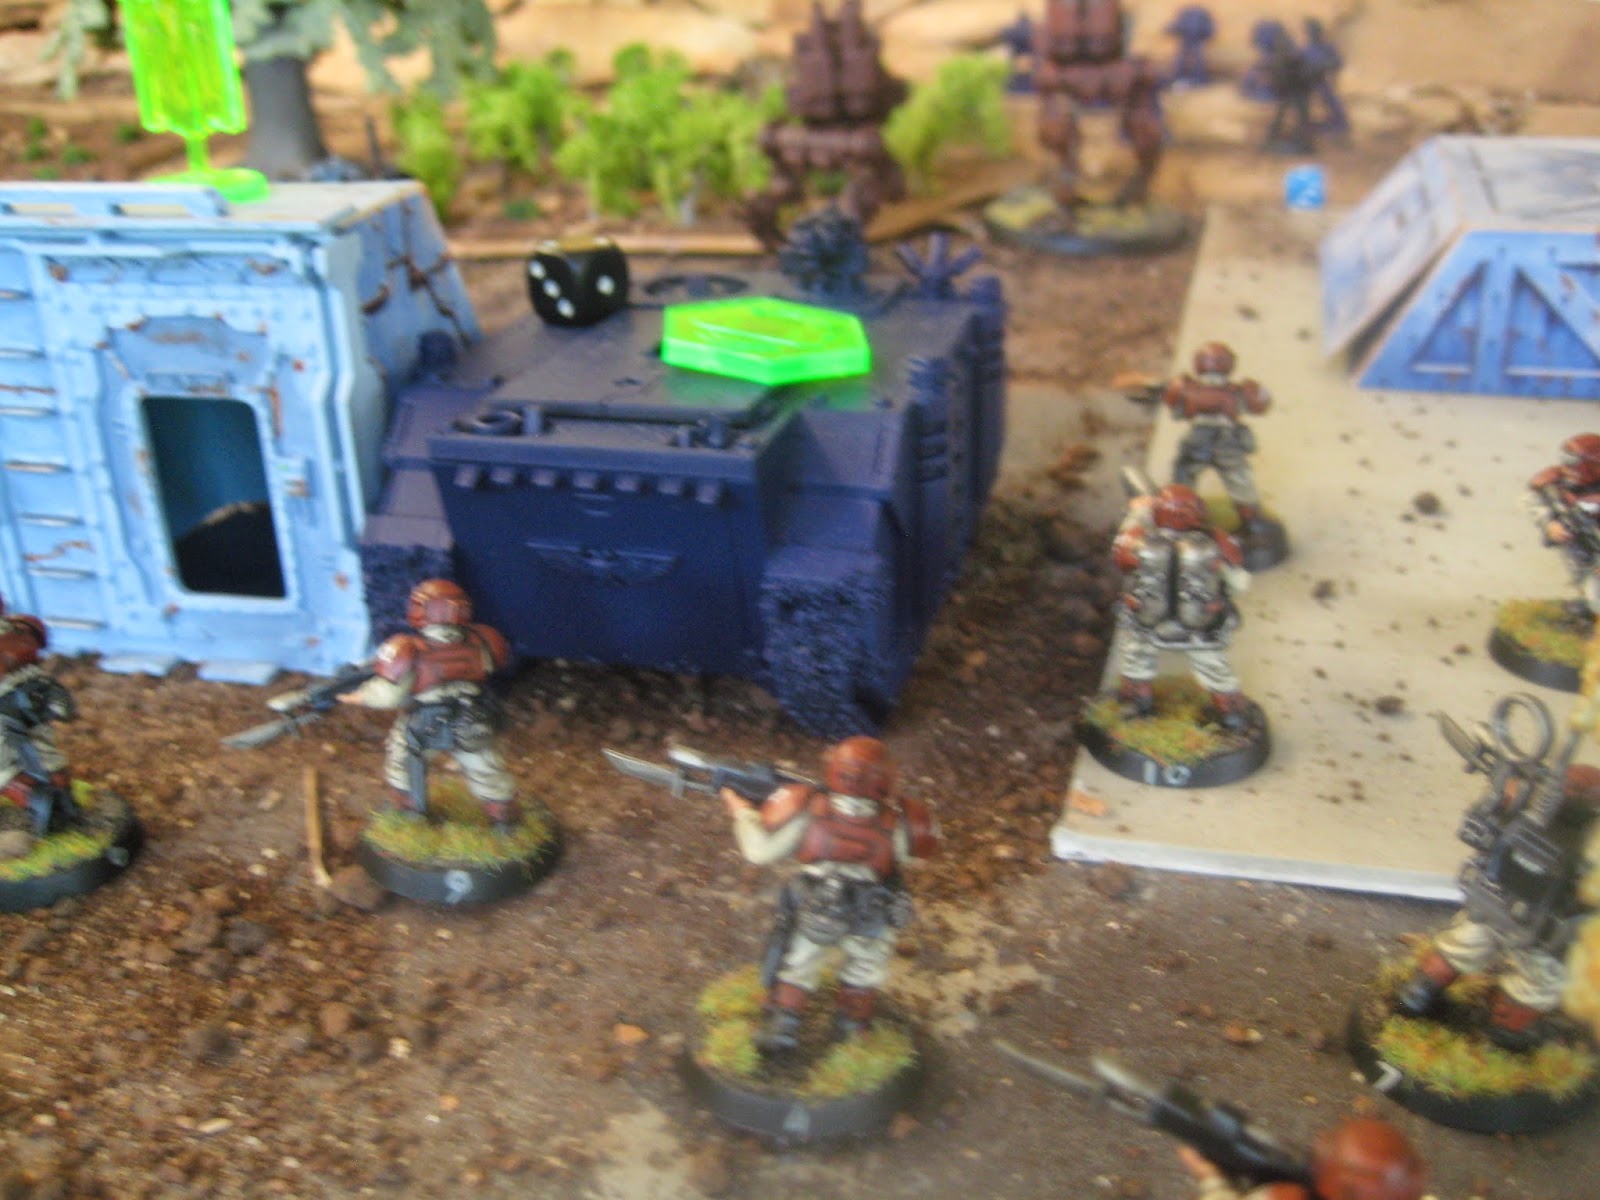
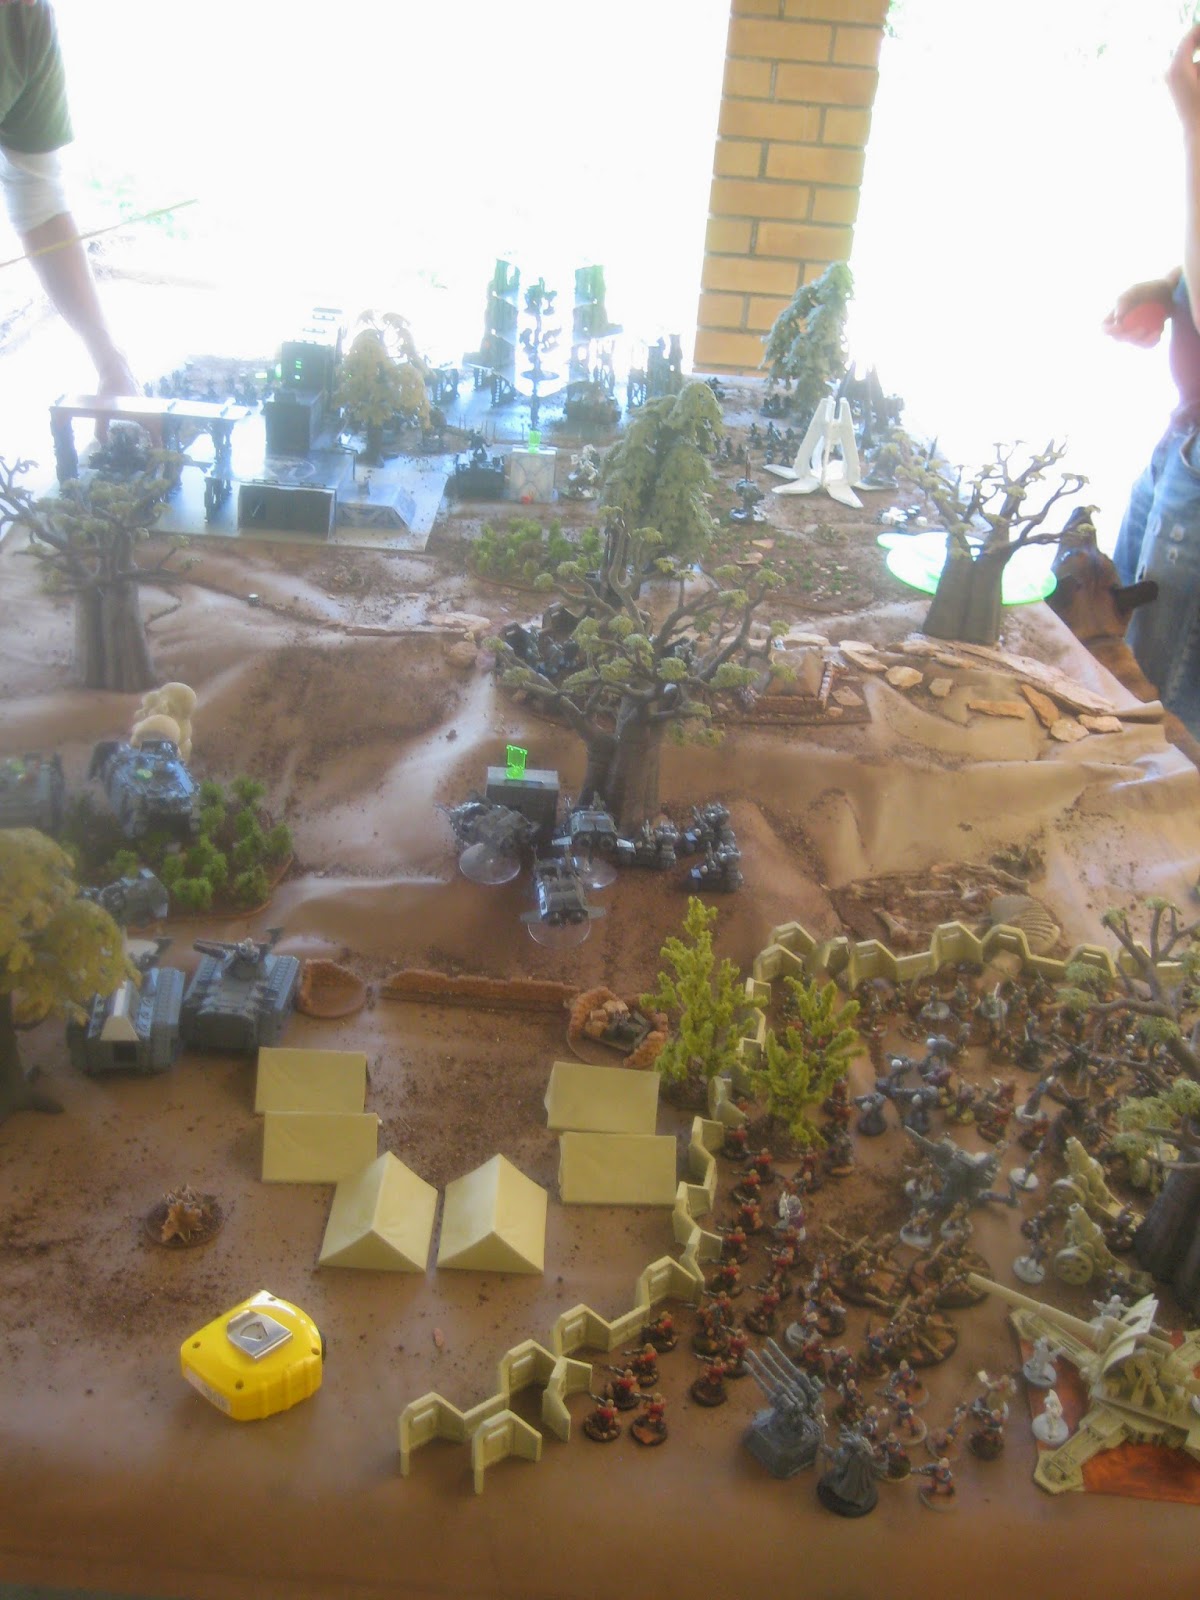
Well that was a long break between drinks!

The last few months have been full of too much work and not much hobby time. As a result the little rulers of the Necron Empire have been growing irritated. Under their orders, the builders put down their tool and picked up weapons to slay some explorers that ventured to close to the city complex.


In the spirit of fielding units that you want (opposed to units that are good) I am going against the internet masses and have been making up some count as Flayed Ones - because we all need our close combat troops to be I2, no power weapons, can't take a transport and are incredibly slow. I could always deep strike them (but they can't charge and don't have a gun). Seriously, these guys really don't look good on paper!  The Cron tactics page at '1d4chan' starts their discussion of Flayed Ones by saying "These guys are almost universally regarded as the worst unit in the Necron Codex, and with good reason". This is followed by a review that convinces you that taking them will lose you the game. Finally it concludes with "They're the single worst unit in your codex, don't take them. They're a terrible, terrible unit." Sounds like the sort of unit I need in my army! The next time I pull that win out of my arse it is going to feel good! Optimism aside, as a fluff gamer I am free to take whatever units I think reflects the look I'm after. Flyed Ones give me the opportunity to model up a horde of sword and shield infantry.

After a bit of cutting and gluing I came up with 20 individually posed hacking, stabbing and slashing warriors. The wife looked on with amusement as I acted out the stances myself to work out the positions of the arms and legs. 

 A few more with their shields attached:
Lined up above my desk.
Cut down Tomb kings skeleton head
 A cut down Necron head.
And I finished one off with a head and cloak. I'll get back to finishing the other heads and cloaks some time.
The dog looks on at my very slowly growing Necron army.

[Edit: In the time between writing this and getting off my butt to hit the 'publish' button, I have used these dudes in two games. The first I won and the second I tied. Are Flayed Ones a bad unit? Yes, pretty much anything else would be a better use of the point. But that being said they are a pretty fun unit to have run around and get minced.]


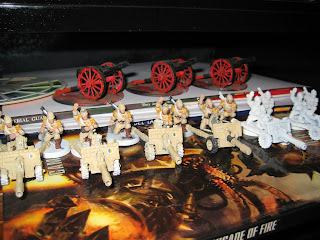
Other than these guys there are a few nice additions worth checking out.

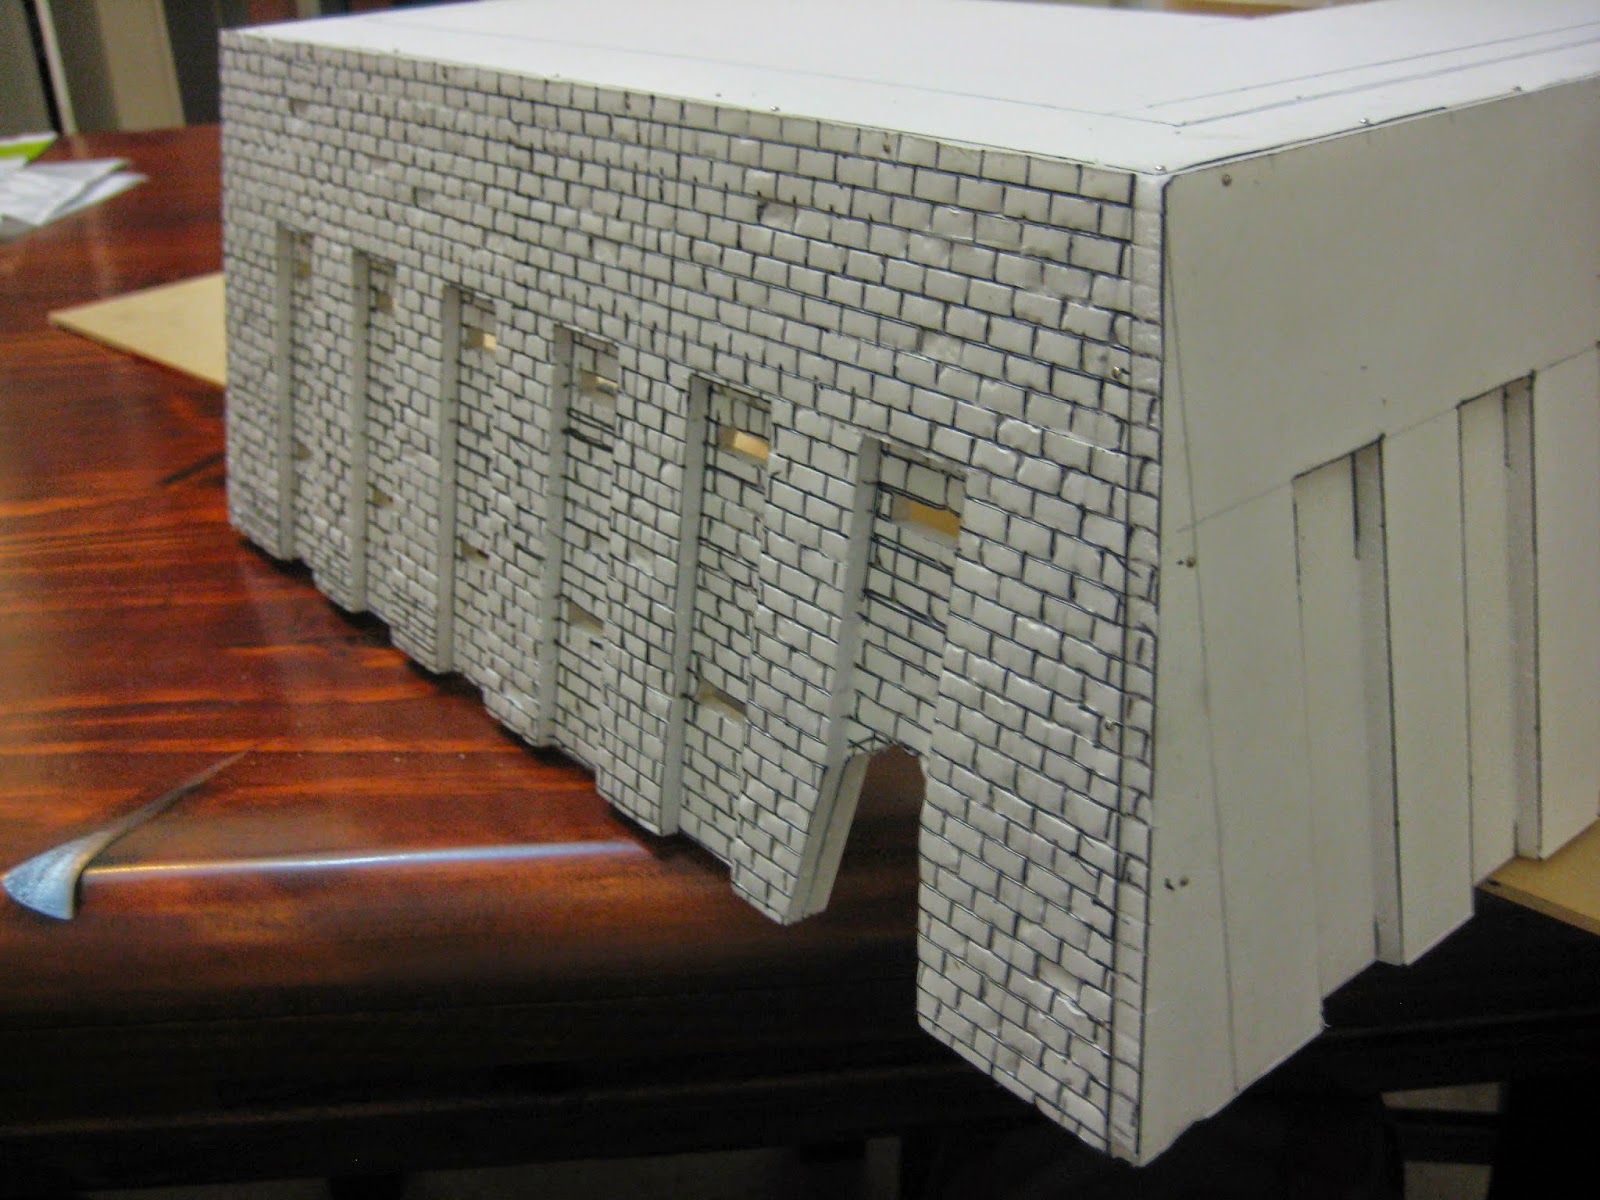
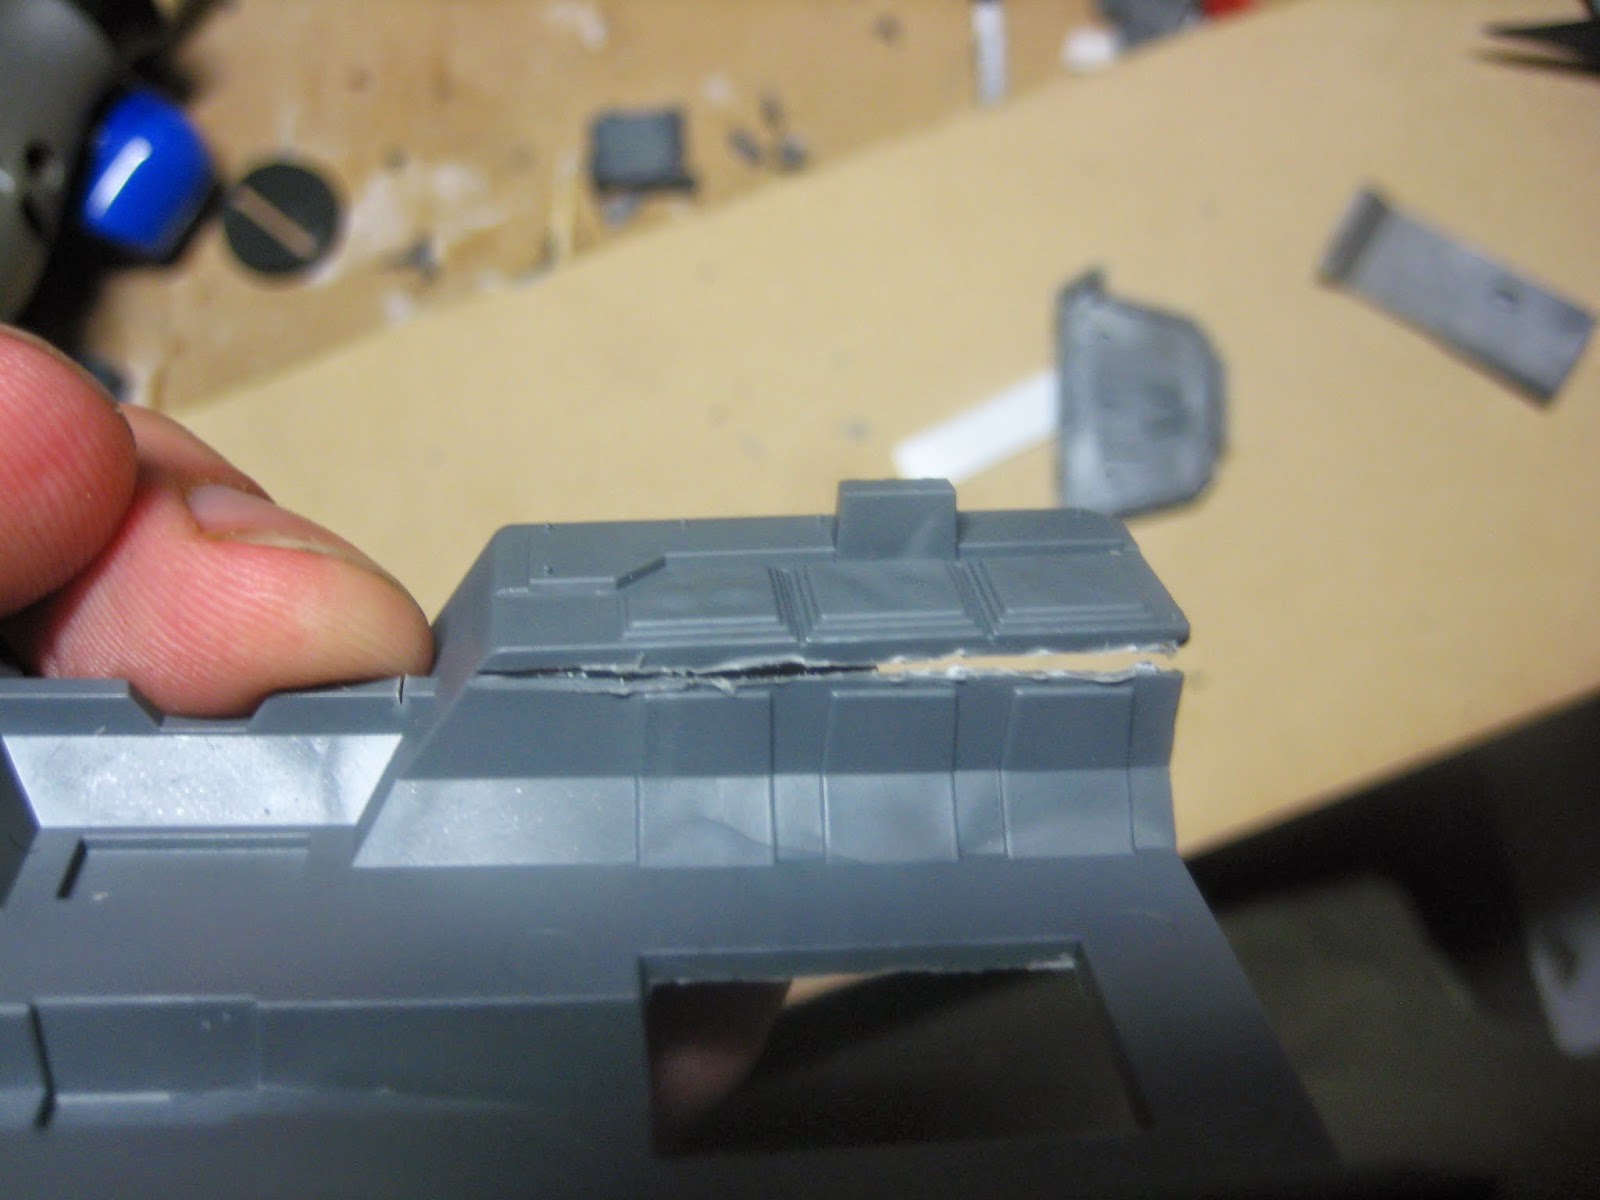
First up, there has been some temple progress. This is where I left it at the last post.

Base mostly done, front walls almost done and roof edging started. Our souther hemisphere  winter dramatically slowed down my casting production line. It wasn't that the cold effected the casting but more that it was too cold to venture out into the shed in the evening! Even so, I now have cast up enough blocks to fully build the lower level of the temple.
[Soon it will be getting too hot to venture into the shed so I better get cracking!]

I planned to add a second level topped with a big dome to mix in a middle eastern feel. For the dome the 'Dome of the Rock' (on Temple Mount in the Old City of Jerusalem) immediately came to mind - particularity because it is gold. 
...but so does the United States Capitol Building.  


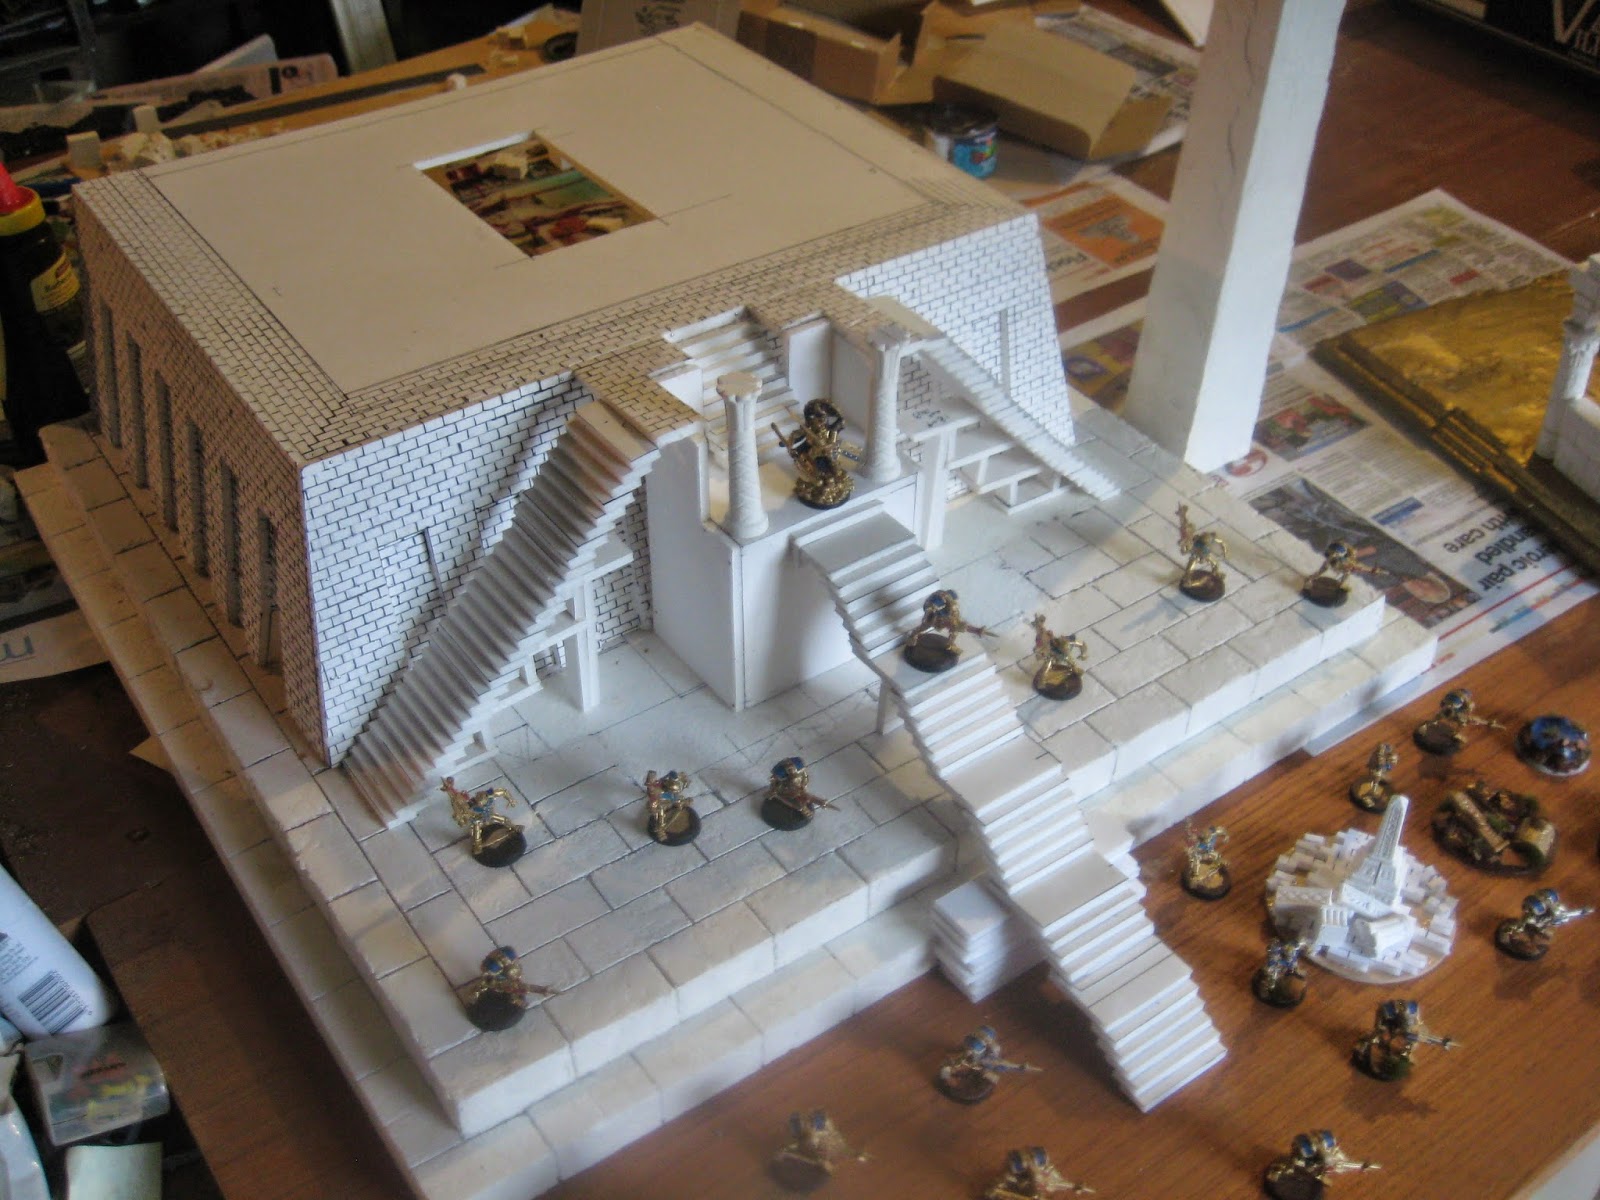
While my little temple is a tiny construction compared with these complexes I felt a dome would add some significance to the building and help it tell its story.  I liked the look of the dome supported by a ring of columns so I wanted to include that. To mix things up a little I decided that the dome would be a large 'energy sphere' - thinking along the lines of the old Vortex Grenades or Dark Eldar Web-way Portals. 
Seething that these are hard to find, expensive and ultimately too small, I set out to make my own. 
This was all completely 'on the fly' and I had no idea how it would look. I found a bowl that was roughly the diameter that I was looking for, grabbed my DAS clay and some cling wrap.
I lined the inside of the bowl with the wrap and folded in lots of wrinkles.
 Then I pushed lumps of DAS clay into the bowl until it was roughly the thickness that I was after.

It took several days for the clay on the inside of the bowl to harden. Once it was hard to the touch I carefully pulled it out. The outer side of the dome was still soft so I left it another day or two and then it was properly set. As I had hoped, the cling wrap had left random groves in the clay. This would be painted up as ‘energy bolts’.


I started painting one small patch to get an idea of how it should look. I realised it was going to be easier painting the whole thing in a light colour and slowly work darker between the crackling energy bolts. Having the energy bolts indented rather than risen means that it is a little backwards to paint but I’ll stay at it until I have something that I am happy with.


Currently it is still sitting on my desk like this. I need to find the motivation to cast up some more columns for it to stand on and make some sort of mechanism to generate the energy dome. In terms of fluff it might be a 'Dolum Gate' or a 'power plant'. In game it will probably emanate a vortex shield.


Also I started my city wall. This was inspired by the giant walls guarding Babylon, Niniveh   and other ancient Akkadian and Mesopotamian cities.
  

To alter the look slightly I decided that my towers would be round drum towers instead of square ones and I wanted to build a big Necron gun turret on top of each of them.
Baby formula cans for the towers...
Necron architecture frequently includes trapezium shapes, so added some from a sheet of cardboard. 


Container for the turret base. 
Building the tower parapet.

Battlement walls in ancient Middle Eastern style.


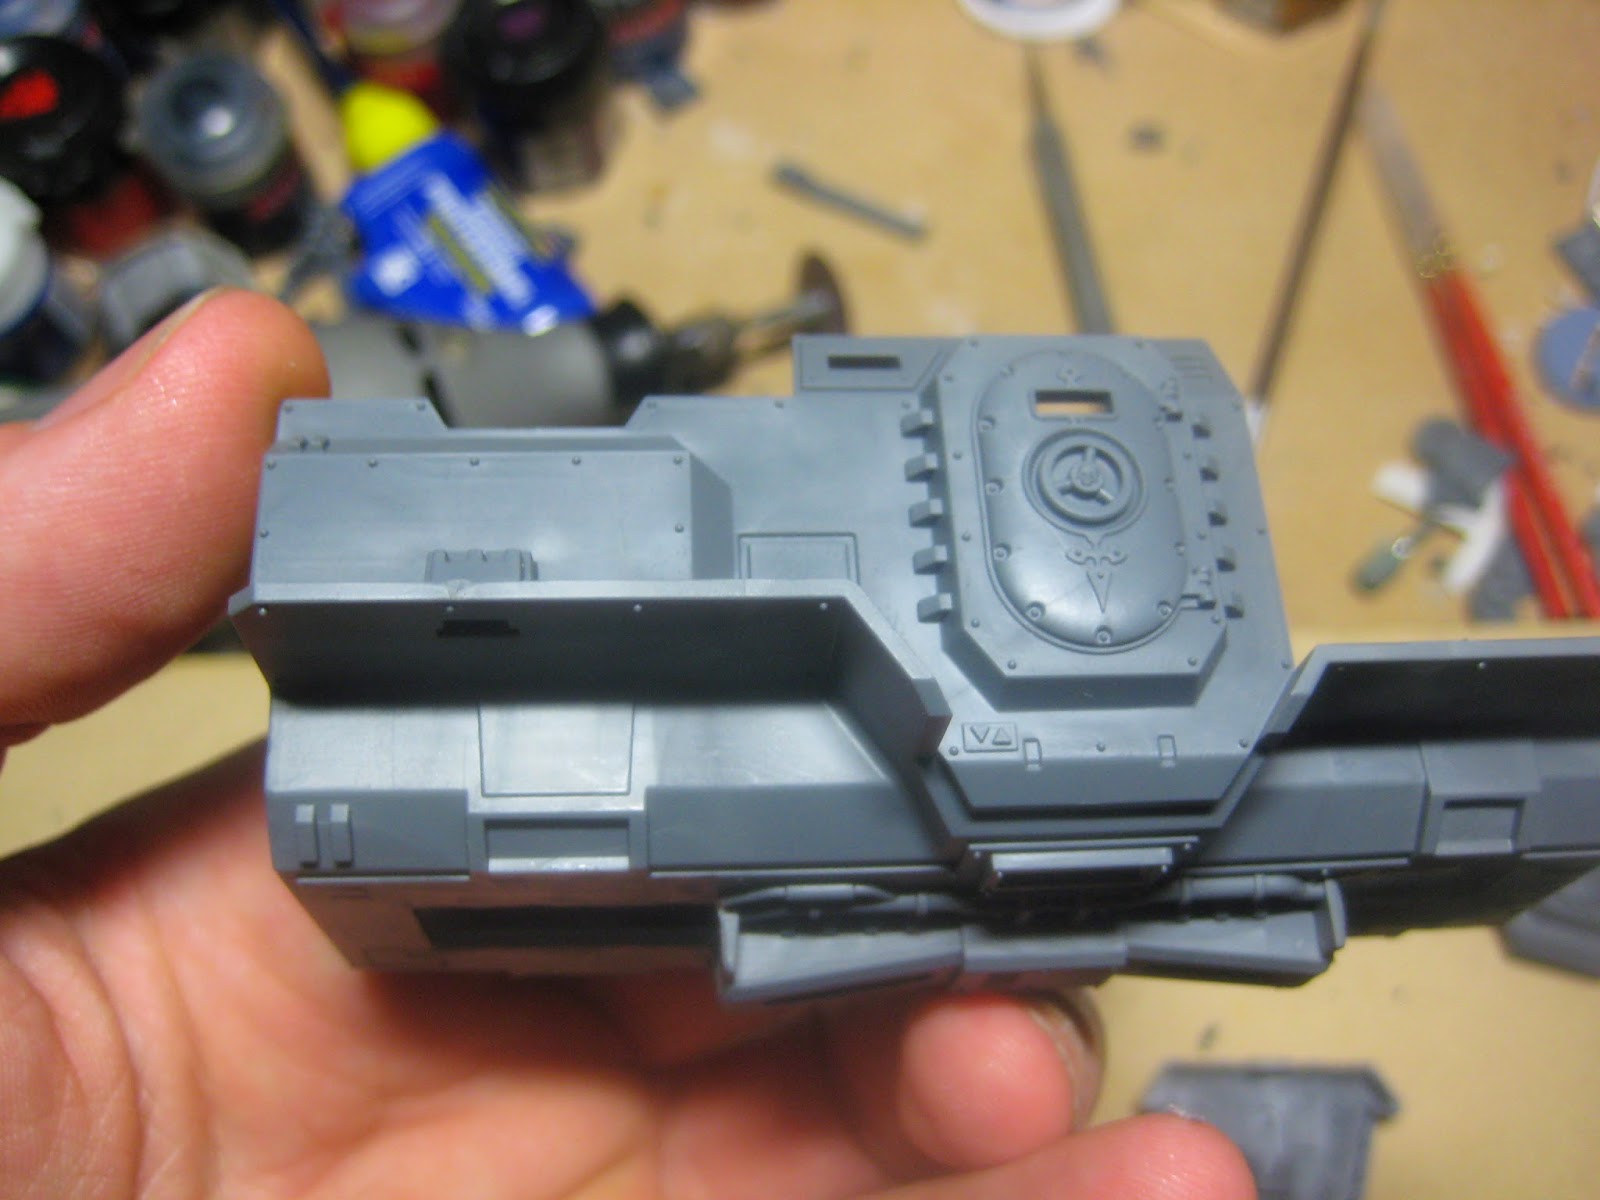
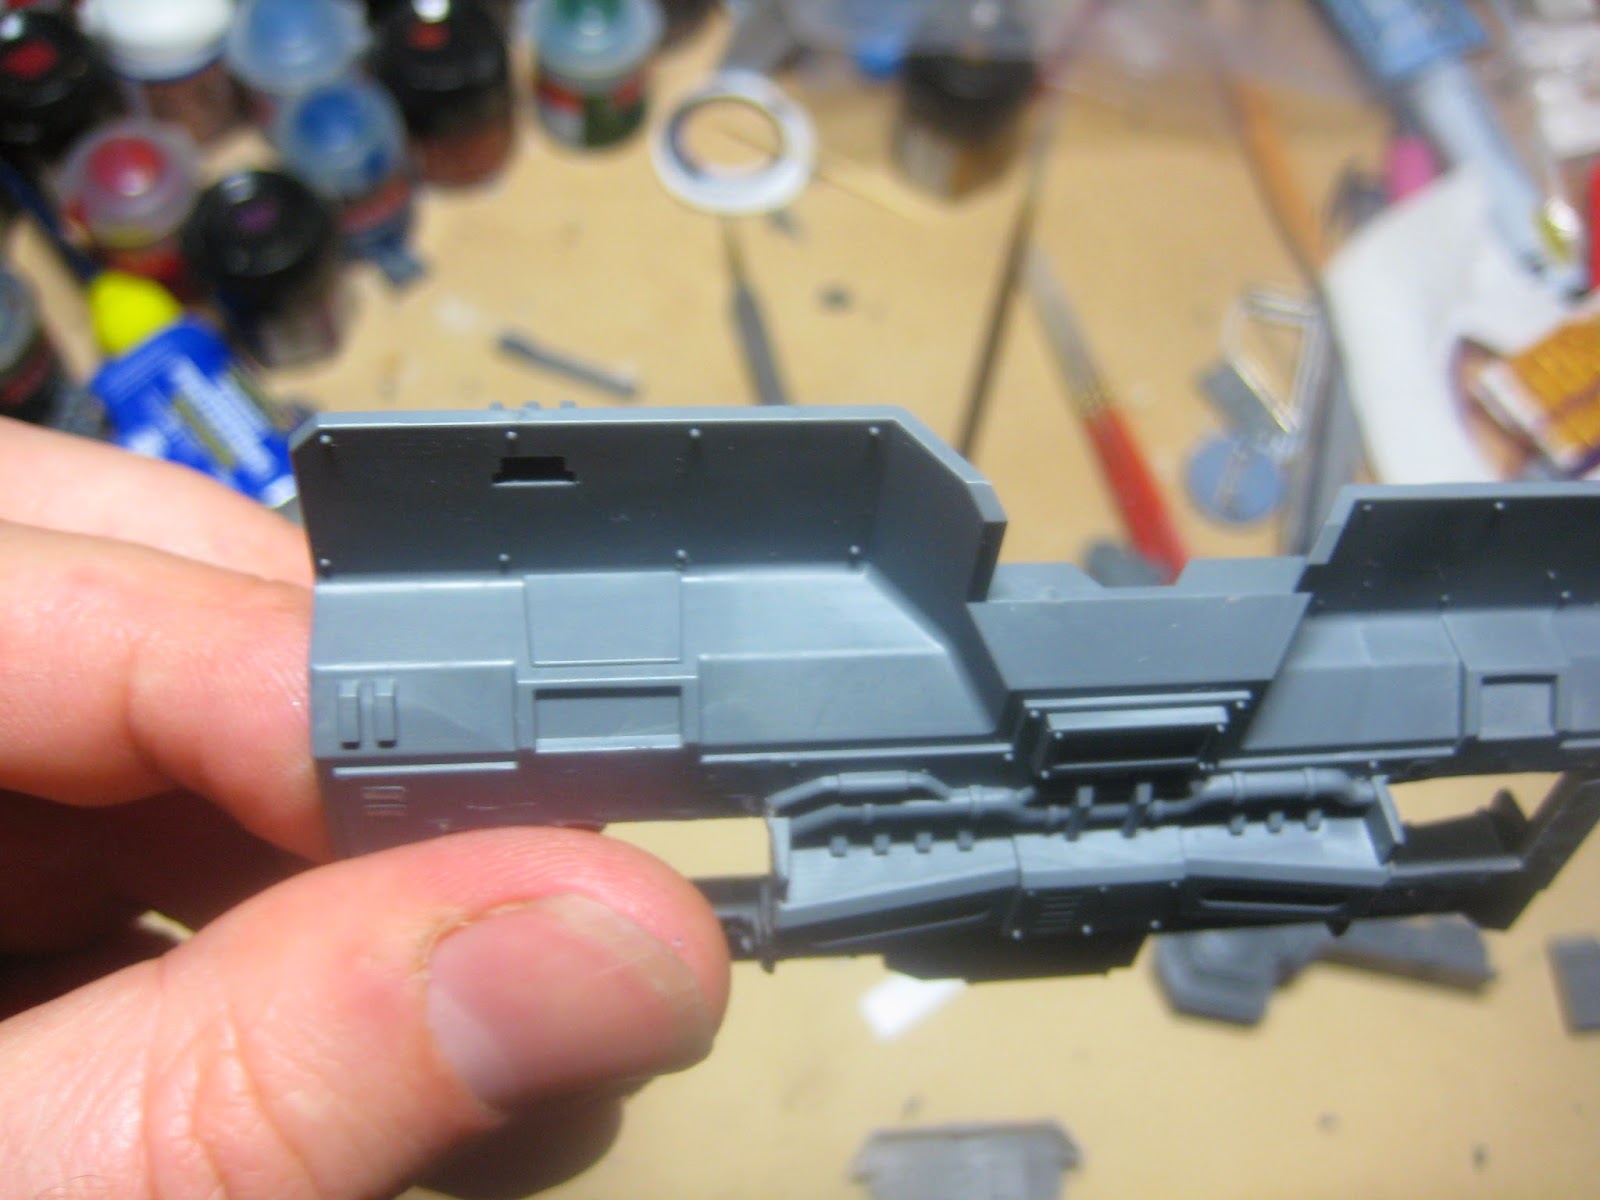
And my big Necron turret from my bits box.


Now just to build another five more and add the walls.

Back to thinking about inside the city, with Mr Zzzzzz's help I have some really cool additions! 
Our blogging friend Mr Zzzzzz asked if I had thought about adding those cool Forge World Necron tomb citadels. I said "sure, but they are a bit pricey". To this Zzzzz, in an incredible act of generosity, offered to chip in towards one. "Wow" I thought, "a Necron tomb citadel is going to look awesome in the city!"
From there I went into negotiations with the misses, my parents and my sister and managed to get them all to give me 'hobby funds' for my birthday. I added to these by selling off some Tau and fantasy gear. Then by combining my order with a mate I managed to get the order above the free shipping threshold. With all of this combined I had just enough to secure myself TWO Necron tomb citadels!! I was one happy man! 

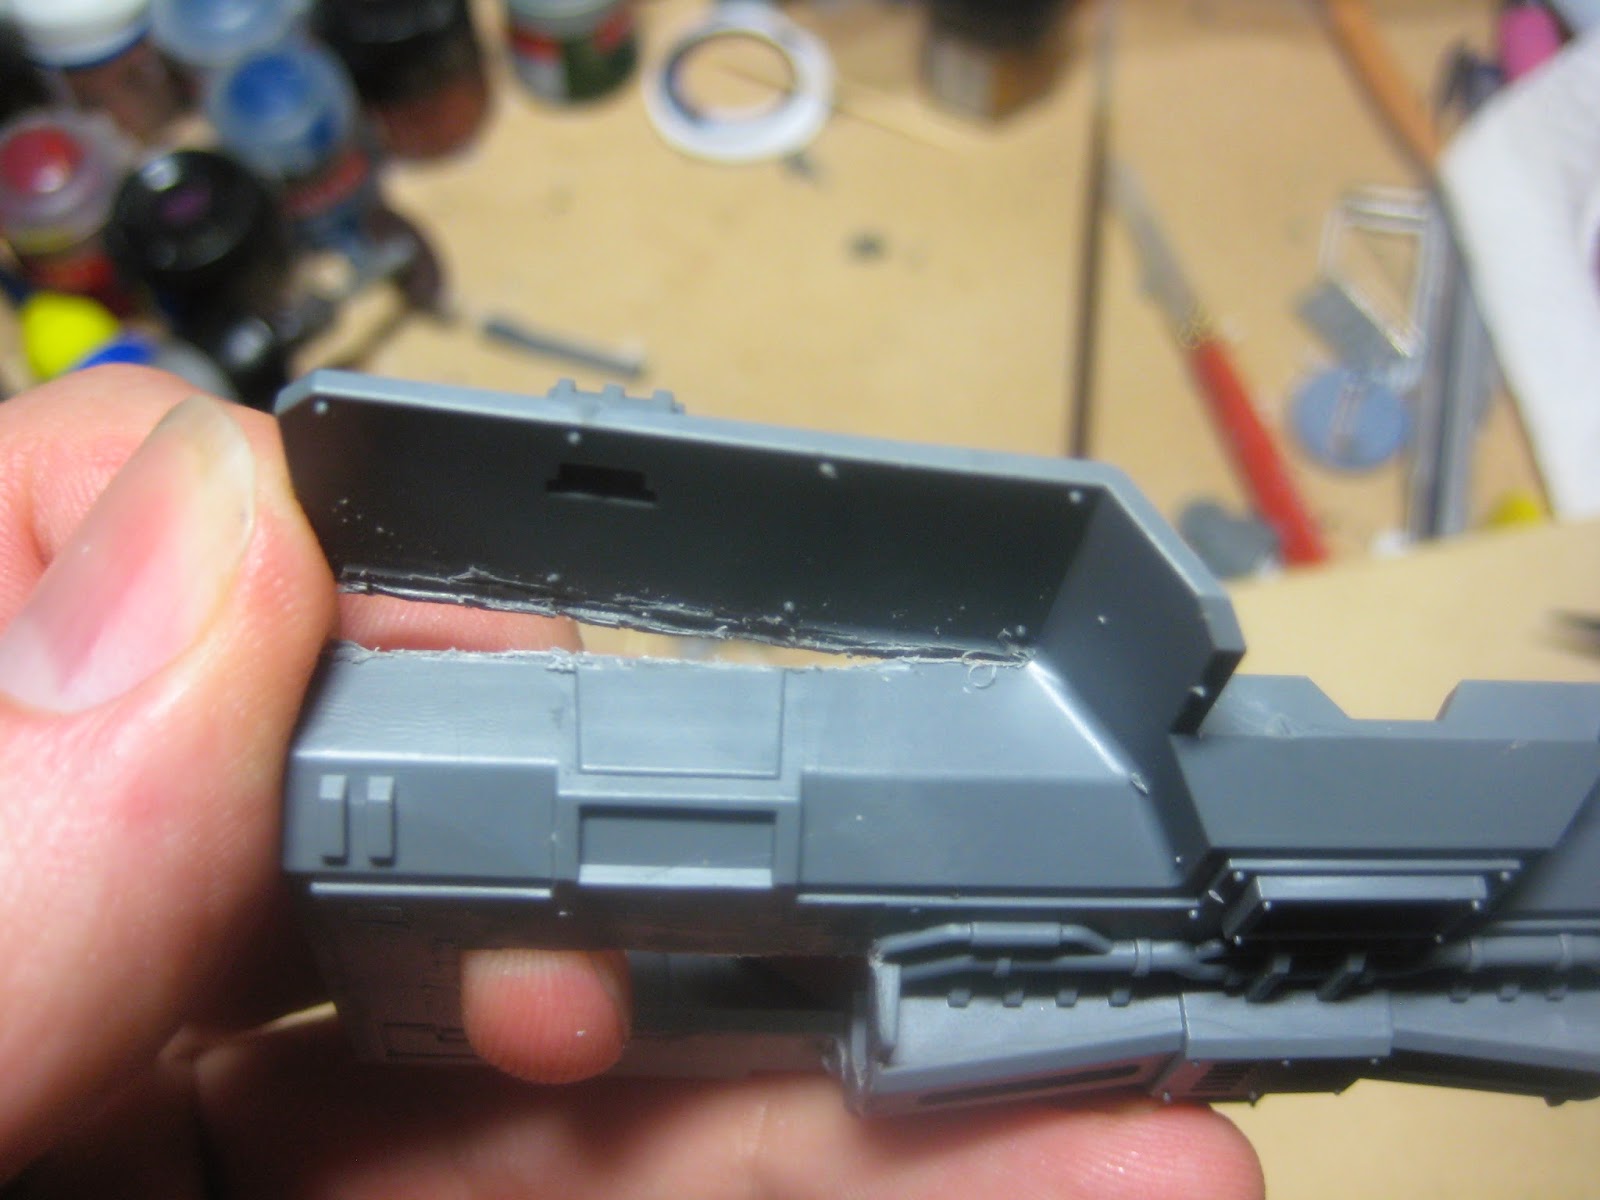
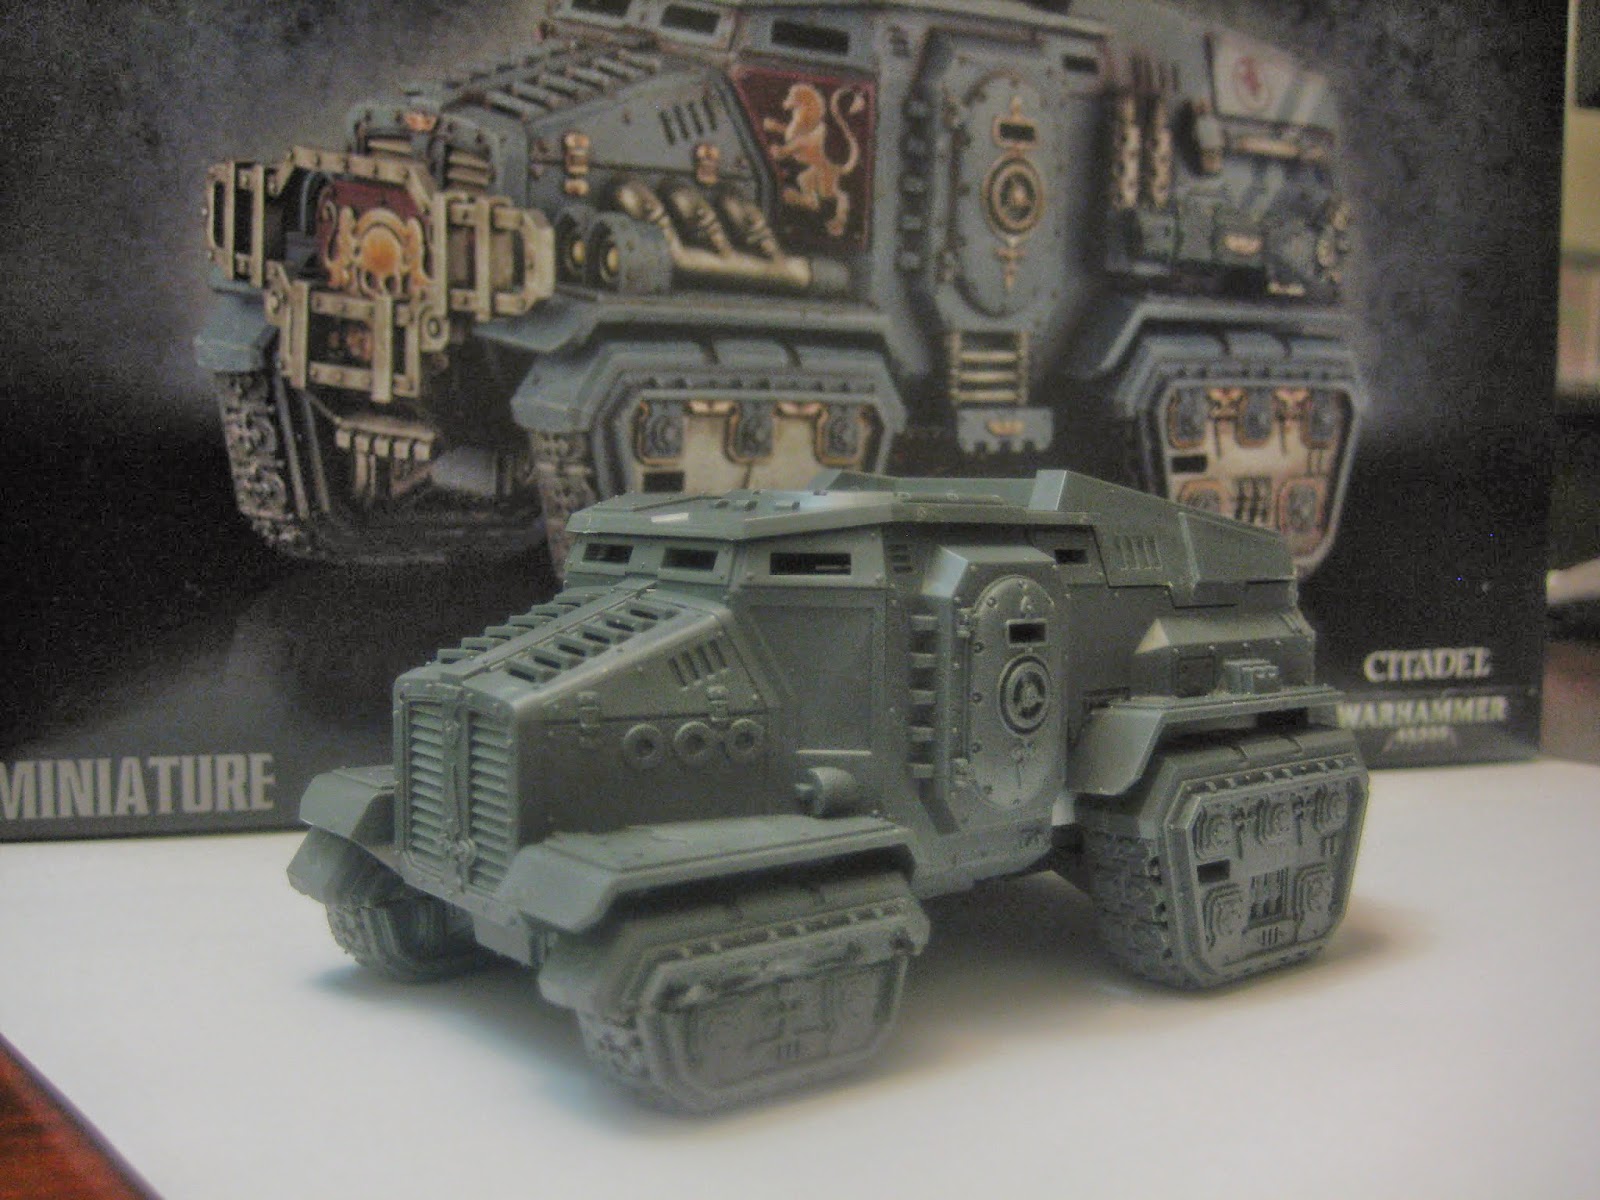
Here is one just after unboxing.

The two of them sitting on my lawn after having had a spry with the hose and scrub with some soap. On one you can see a test spry spot of gold paint
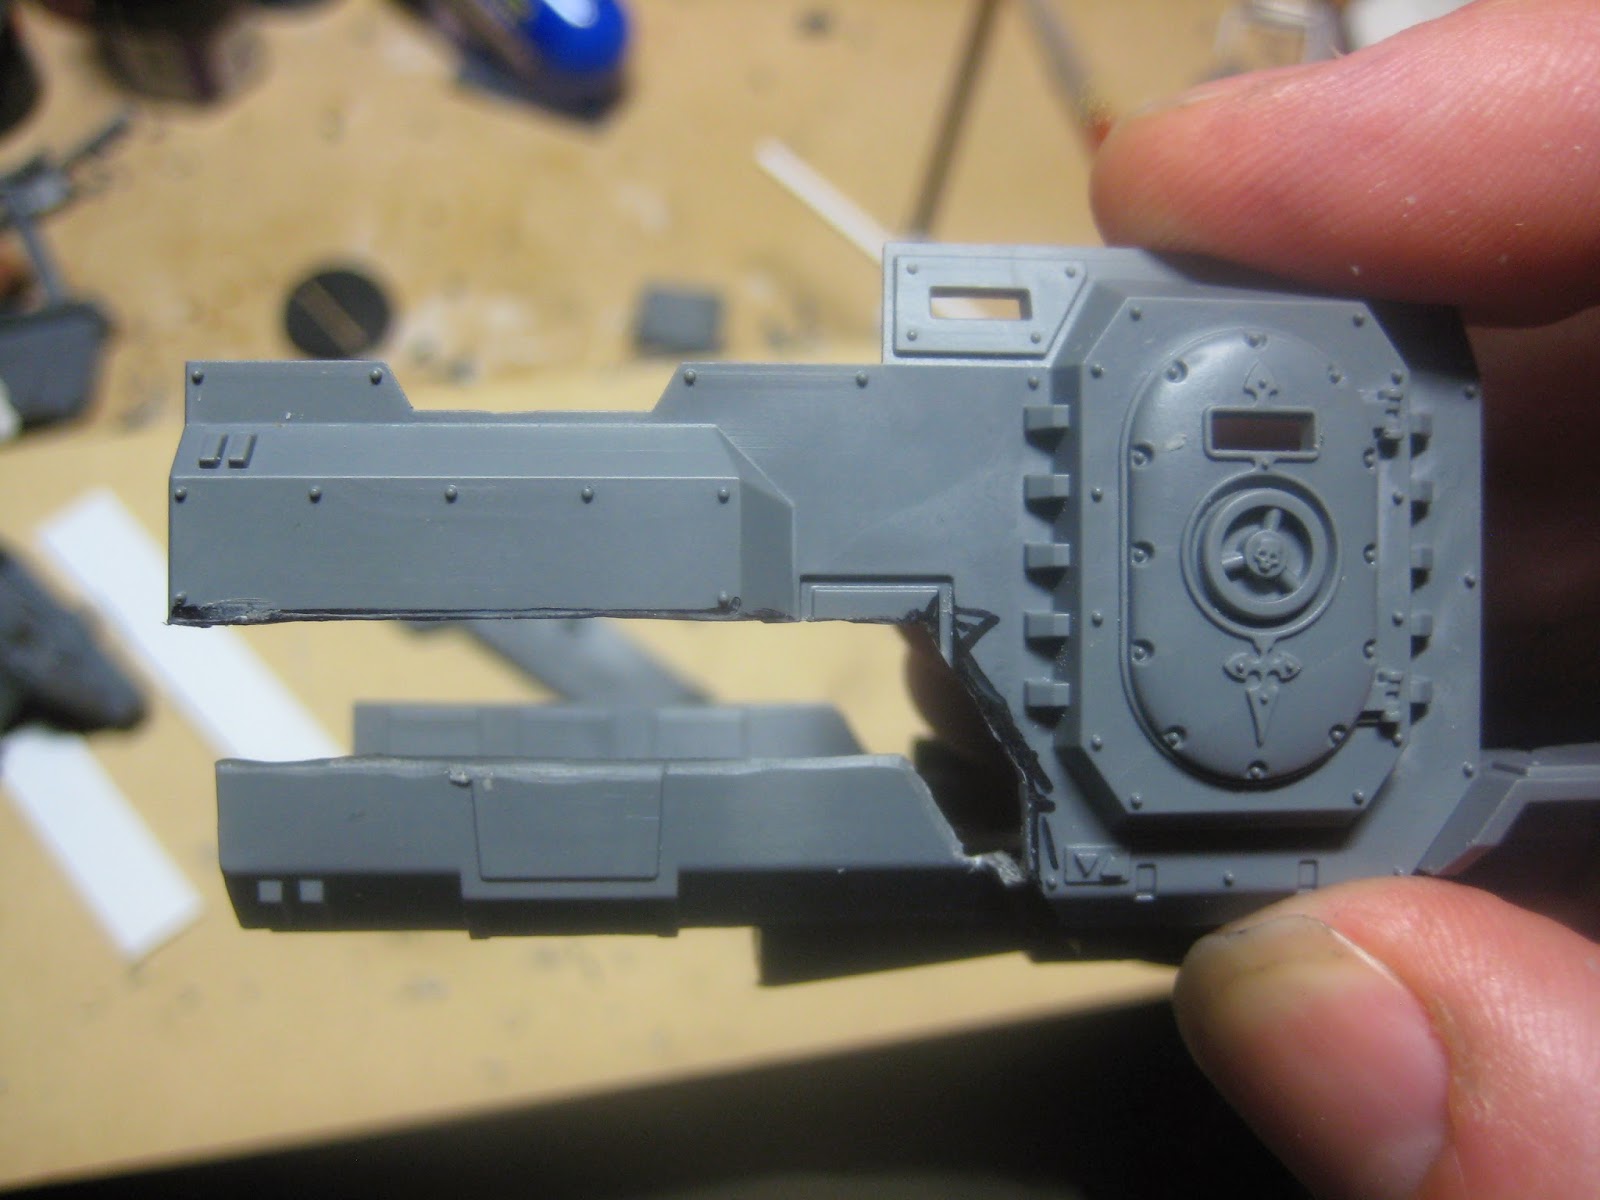
Both of them had some slight warping of the bases.


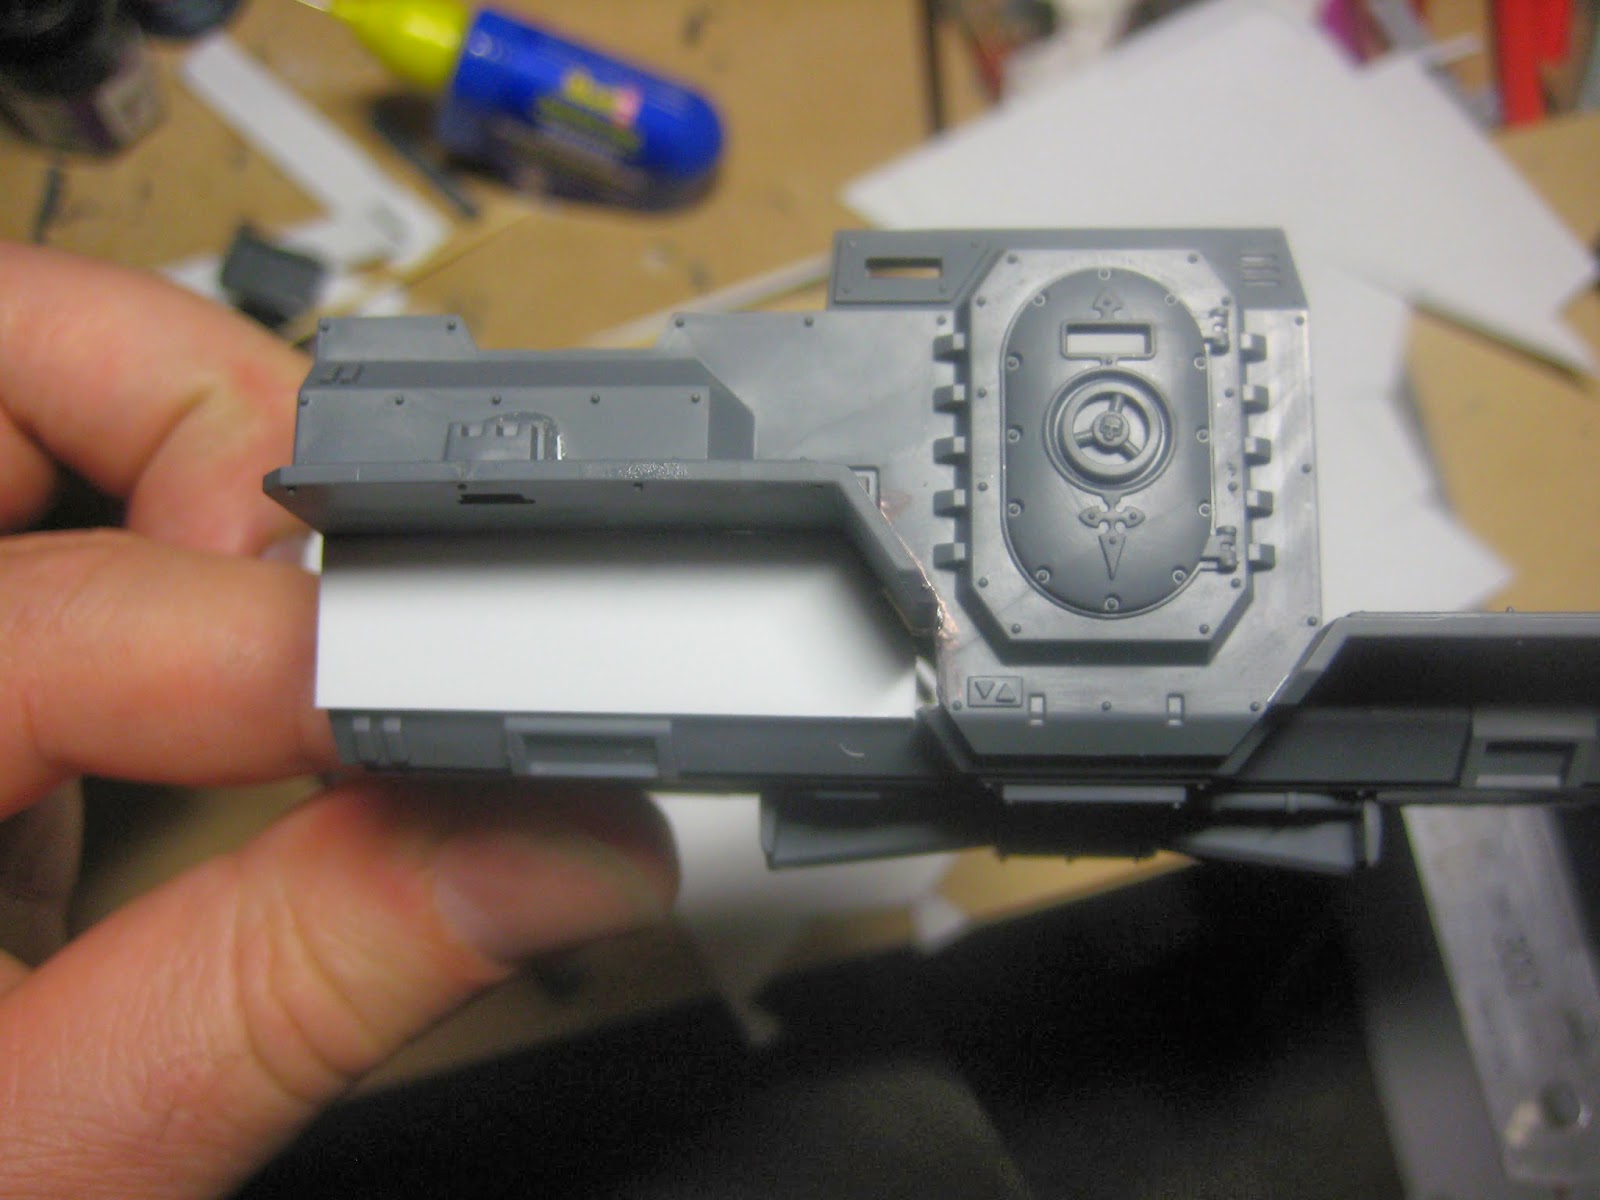
I weighted them down with some bricks (on foam) to flatten them out.
The bricks worked for one of them the the other is still a little bent. My mates suggested I try some warm water in the bath but it is a bit too big. At that point I considered my parents big outdoor heated spar... I'm sure the the misses would not understand why I was heading to my parents place to use their hot tub with my terrain under my arm.

Here is one with the first spray of paint and a few bits of added terrain detail to see how it might look. There is potential there.

Later I headed out to my local 'cheap shop' to pick up bits and bobs for terrain building.
I found some blue decorative stones that fit nicely into my monoliths.

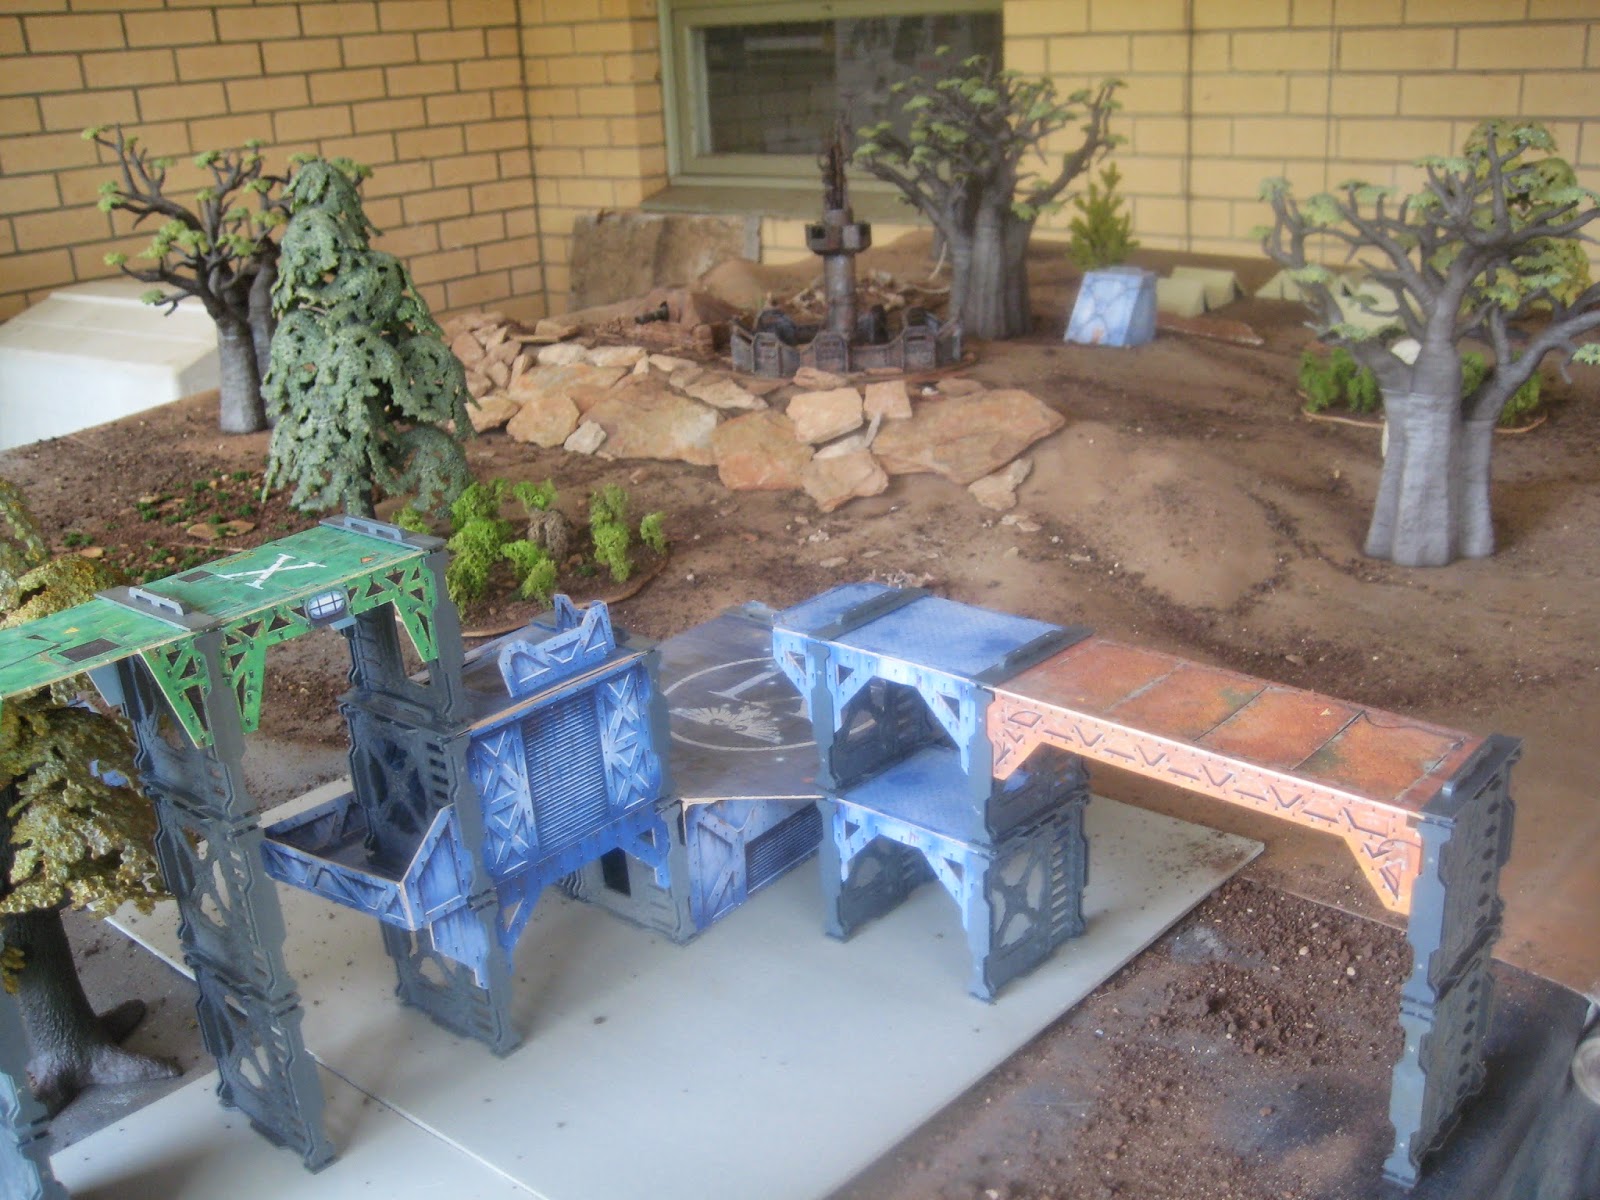
But one of the main reasosn I picked up supplies was that I wanted to add some foliage!
I clipped off a few stems, painted them and sat them in a few golden c
anopic jars that I had cast up.

I also wanted some larger pots of ferns so I hollowed out a few bricks. 

cut off some leaves.
Then taped up a large fern plant.
Here it is panted handing over a walkway.

I sprayed the coloumns gold too.
I wanted the columns to be a focal point of colour so I painted some purple stripes on them. I also considered have some sort of flame on top of them as if they are a form of light pole or energy emitter. I wanted them to look like they have a purpose. I settled on a blue energy ball floating above them. I have no idea what these decorative wire balls are actually meant for.

I have only made one so far.
While this is all looking good, I found one problem. My gold paint is rubbing off the citadel. I might need to give it another scrub and undercoat it before spaying it with gold. Damn! 
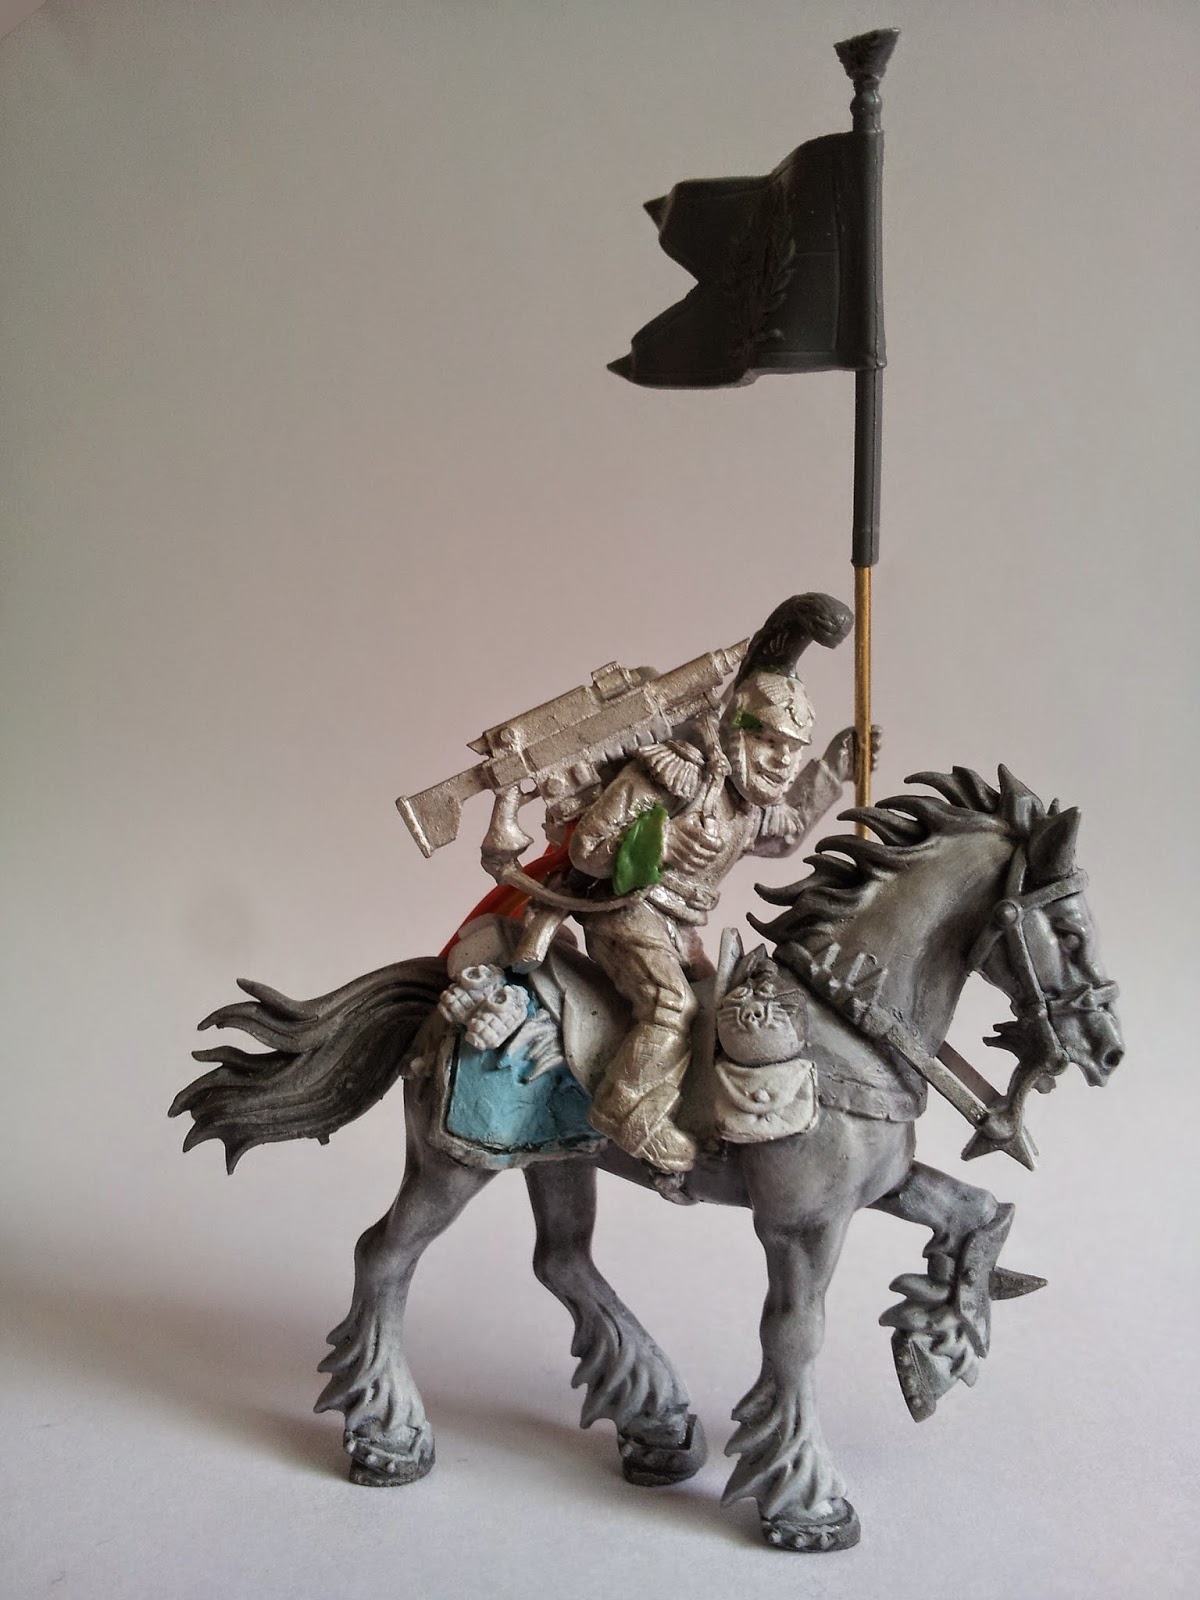
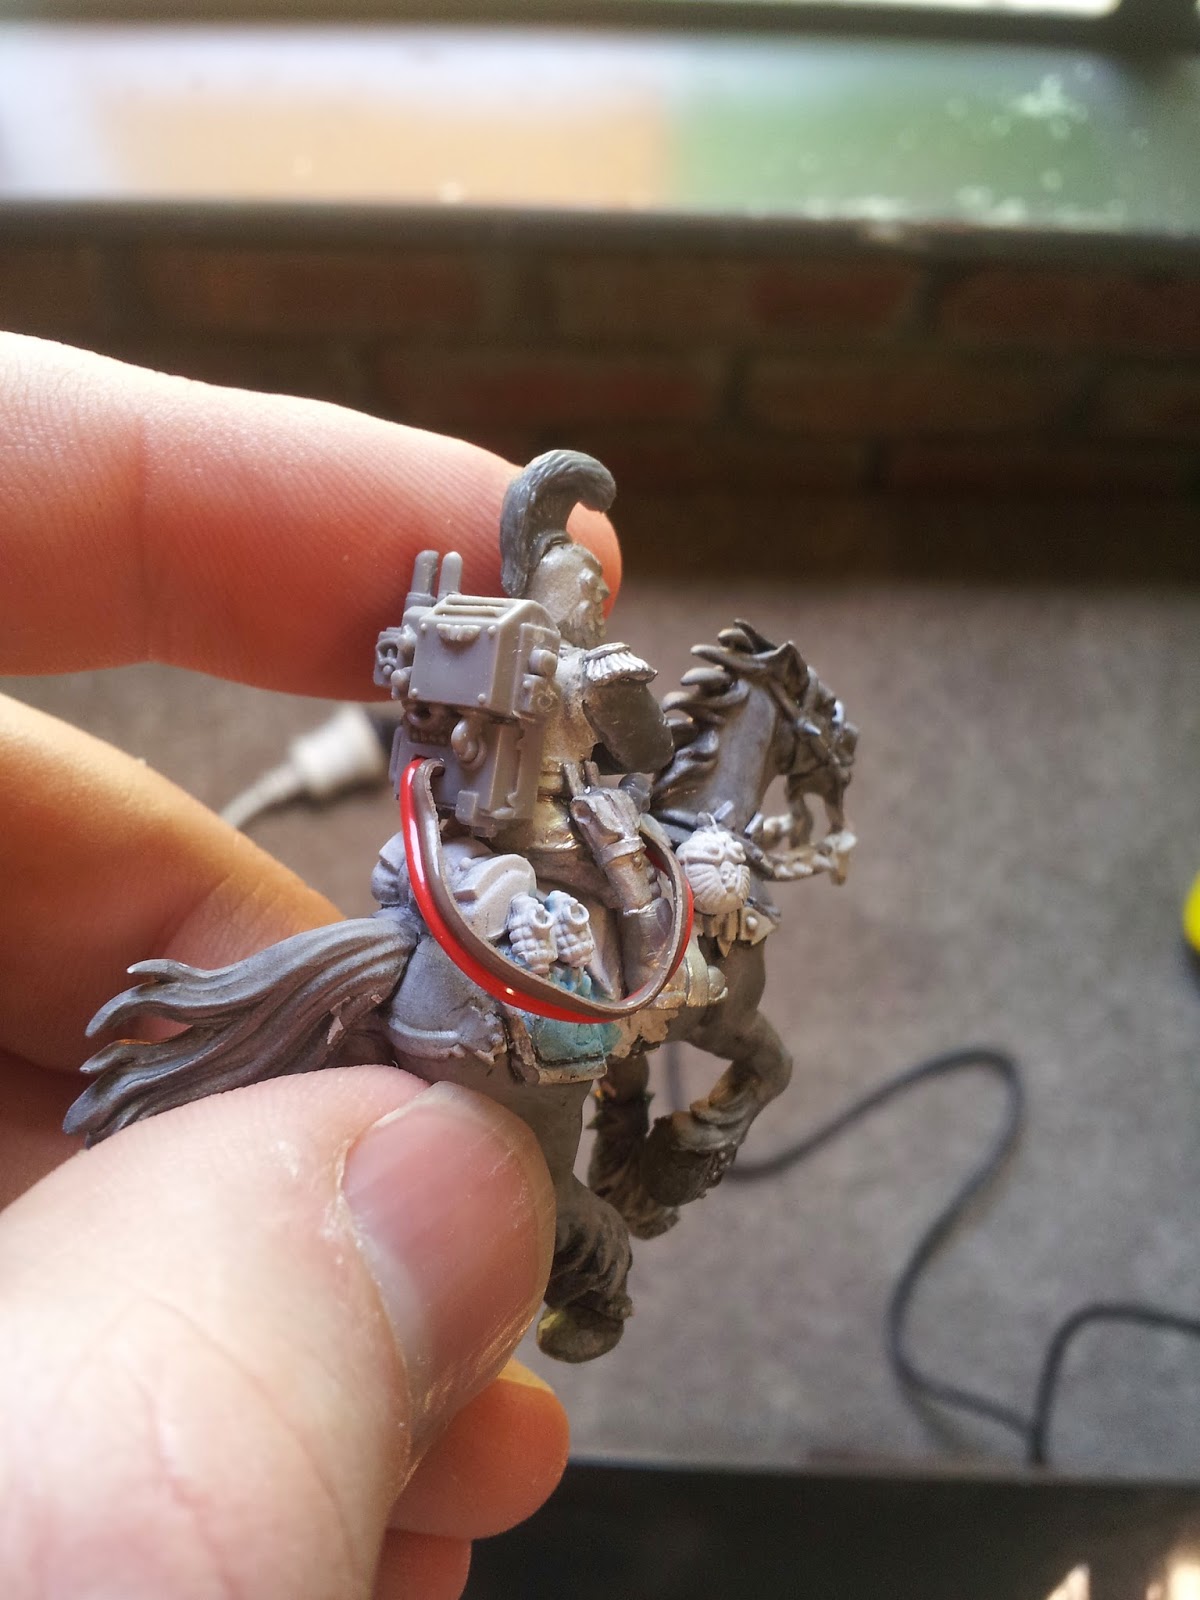
One last little thing, while messing around with terrain I painted up an inquisitorial hovering artifact platform. This was from the 90's GW Skullz promotion. It will make a good objective for the humans to keep safe.

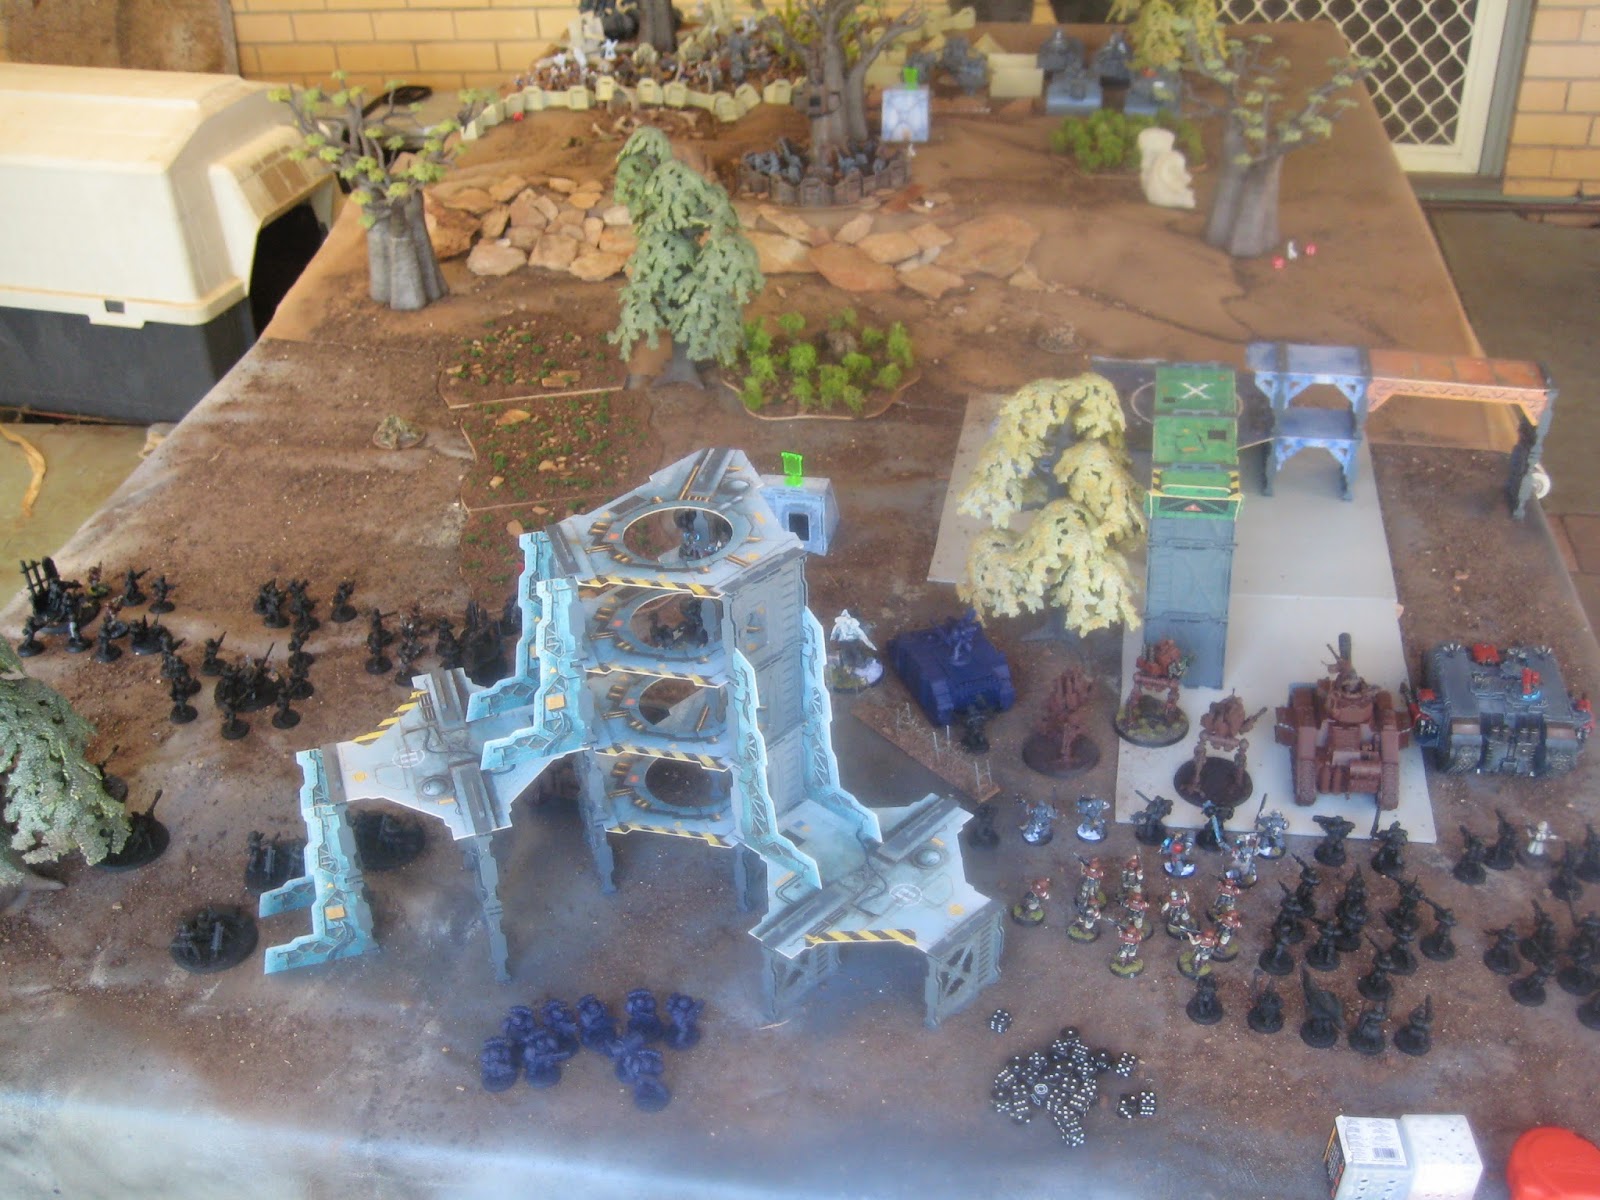
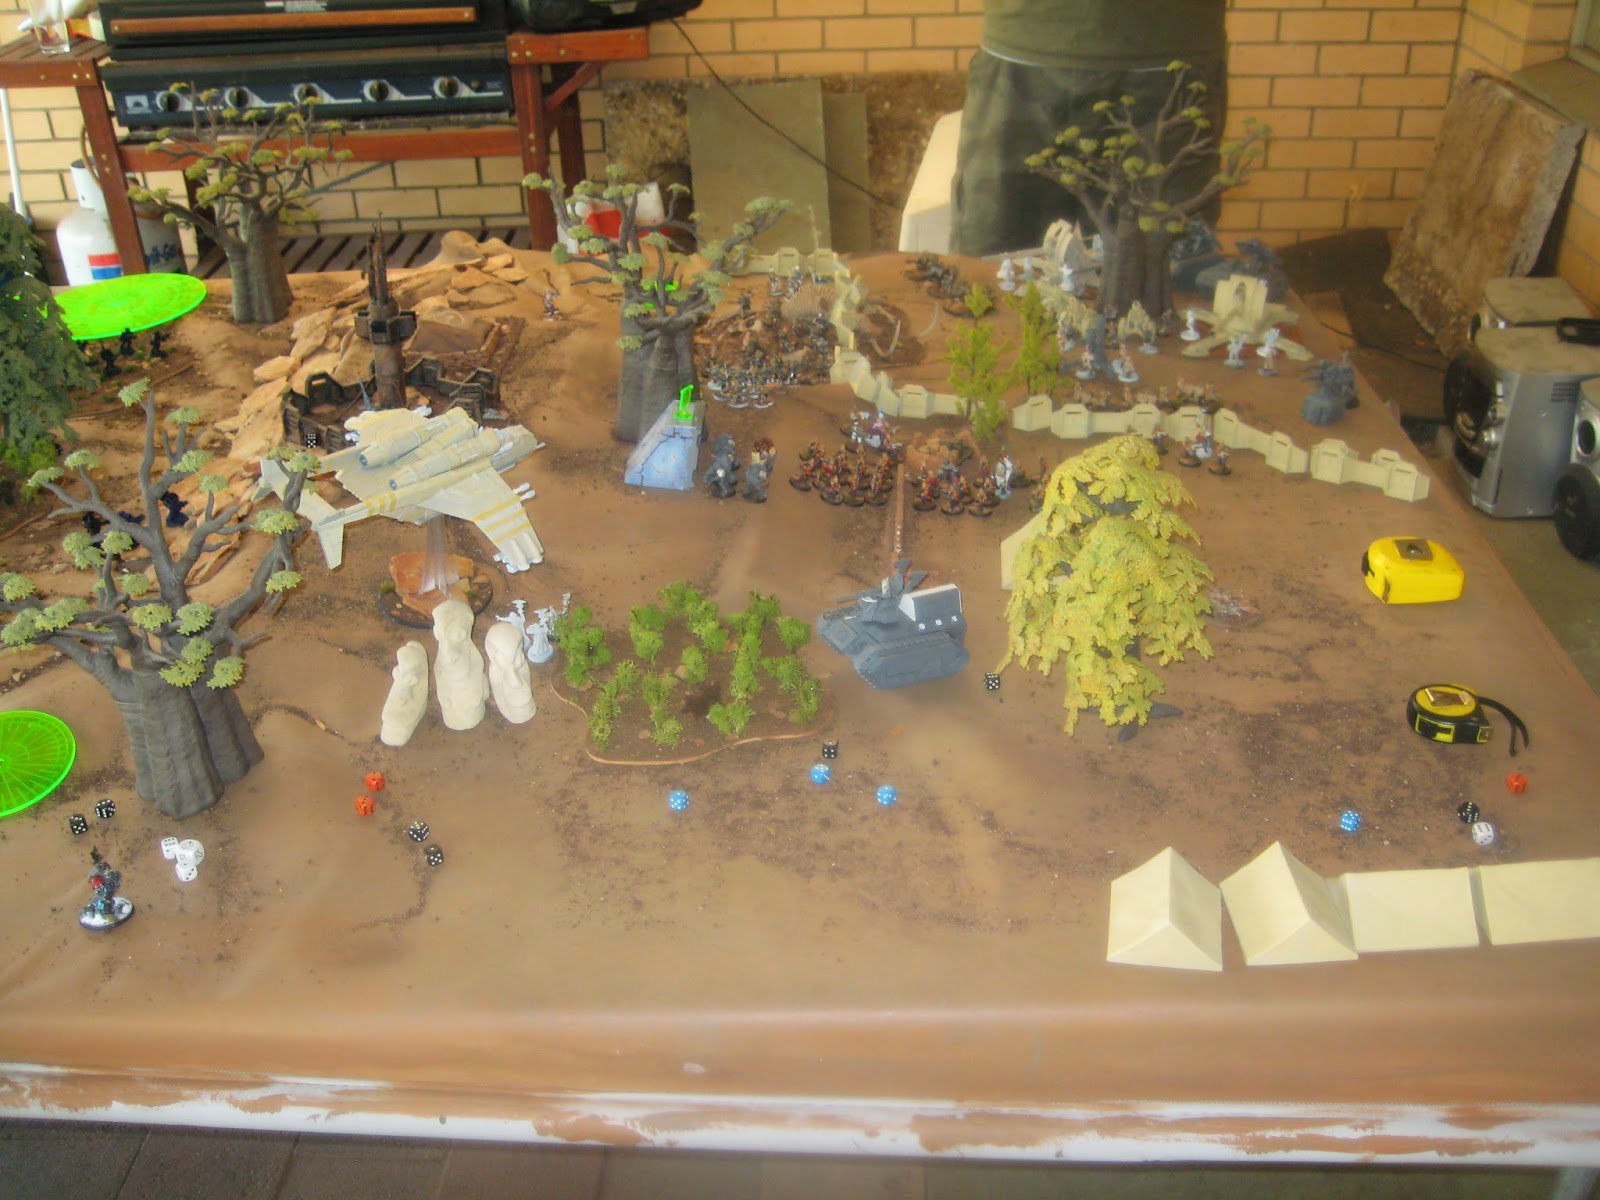
So, that is where I am at with this project. Due to not having much free time I have been doing lots and lots of project hopping as you can see. Towards the end of the year as things quiet down I'll be able to get stuck in and start finishing parts of the city off. Here is a few final shots of the tomb citadel sitting on a Dreadfleet ocean mat. 
Thanks everyone for checking it all out and again a massive thank you to Mr Zzzzz for your contribution! 

Mounted Storm Troopers - 1st Carabiniers, Brimlock Dragoons

$
0
0


In the interest of actually posting on my blog regularly, here is the 'work in progress' up date on one squad of my Mounted Storm Troopers. 

First of, 'Mounted Storm Troopers' do not exist, so lets review how this conversation plays out, through the fashionable and entertaining medium of gif's....


I said, a squad of mounted Storm Troopers.


I'm putting storm troopers on horses.


You're right, there are no rules for storm troopers on horses.


No, I'm not crazy, I simply made rules up for them so we can use them in our game.


....


Yes you can do that. They are called house rules. People do it all the time.


You can actually play 40k however you want, the rules are just a guide line.


No, I'm not making up 'death star' units to try and win every game. I'm just putting storm troopers on horses cos they look cool and it would be fun to see them on the table.


It's actually pretty easy to base the unit stats off other existing entries and work out an appropriate point cost.


And no, I'm not a tournament player. I play for fun. I don't mind who wins just as long as it is not too one sided and we both have fun. Don't you wanna have fun?


You know, you are free to make up some rules too.


So, what do you think?


[pause]


And then we all go play games and have fun!


[I'm sure you all will be interested in the rule details. I have been working on a 'rough rider codex' for a very long time now and I'll post it up soon. My mate Frothing Muppet is currently giving it a look over and suggesting a few tweaks, suffice to say I don't think it is too far off, so watch this space.]


Soooo now that I've clear that up, back to the Mounted Storm Troopers!
This unit has been named after my favourite 40k novel Imperial Glory. The heroes of the story are the 11th Brimlock Regiment; a consolidated mechanised dragoon force. The regiment includes two companies of Horse Dragoons - as the author Richard Williams describes them; "The Horse Dragoons wear gold and silver ceremonial armour and are nicknamed "tin bellies" by the regular infantry. Brimlock cavalrymen are typically highly religious and are devout followers of the doctrines of the Imperial Cult. They are also highly disciplined and consider themselves an elite unit."


I decided that Brimlock might also have elite heavy cavalry filling the shock role of storm troops. Armed with Hotshot Lascarbines, the title of Carabiniers seemed to fit them well. In terms of fluff for this particular unit, after earning themselves glory and honour in a brutal campaign, the severely reduced regiment was deemed too small to be effective. Rather than consolidating the highly specialised veterans into another horse dragoon regiment, the regimental colours and a hand full of cavalrymen returned to Brimlock to reform the regiment. The remaining survivors were granted the honour of joining the Macharian Thunder Guard, a specialised formation of the best veteran cavalry within the Imperium.


I imagined these men looking like Napoleonic French Carabiniers with shiny cuirasses and red plume helmets. Here is an illustration of the historical reference for my conversion. It comes from one of my favourite Napoleonic books 'Armies of the Napoleonic Wars An Illustrated History'.  


And here are a few other pictures from the net.


I last worked on these guys at the beginning of the year. All I got to was assembling the main bits. I always planned to go back and tidy up the details.  Here is how they were.

It is worth a look at what the horses were originally like. 


I filed off the chaos star and spikes, cut off the chain reins, added some pouches and gear then narrowed the saddle width so my riders would fit. I filled in the rips in the saddle blanket and added the triangular corner that had been torn off on some sides. The blanket still didn't look right so I cut it off square.


Next I calved in a stripe or seam on the edge and cleaned it all up with liquid greenstuff.


With the horses all preped I started painting them while I continued with the riders.


Over a spayed base of white I started with a thin coat of Adeptus Battlegrey.

Then worded up with various other greys in combination.

Here is a later one next to an earlier stage.

Being no expert painter and only having fleeting moments at my desk I just kept feathering in lighter colours until I was happy. I gave them a wash all over then started highlighting again. I'm sure after this batch I'll sort out some sort of process.

On my original set of horses I gave them a strong brown ink/wash to give them a darker look. I'll try and do the same to these too.

Slowly getting there.


Back to the riders. They needed power cables for their Hotshots. Cutting this rainbow ribbon wire into strips worked well.
It was easy to bent and kept its shape too.

This is where I am currently at. I have started added large cuffs to the sleeves and tidied up all of the joints with green stuff. I had used a bare Catachan arm set on one rider and so I had to give him sleeves too. A little bit more work on the riders and I can start painting them as well. 

Before signing off, I received a bits order from Curious Constructs. I have to point out that the chainsabres are awesome in the flesh.

I also grabbed a set of desert infantry and renegade torsos.  I can't wait to build some riders out of these guys!

I was going to use plastic chaos swords on the riders but the chainsabres look so good I think I will swap and use them instead. 

Here are comparison shots with both swords sitting in place.


You have to agree that those chainsabres are stunning.

Cheers for stopping by and checking these guys out. It is nice to be back in the saddle making  progress, even if it is intermittent and slow going.

Militarum Equester - A play through of the new supplement!

$
0
0
For those that have not been following this, I have been working on miniatures and rules for a Rough Rider Army for some time now -The Macharian Thunder Guard! Today was the proud day when I finally got them onto the table and trialled my unofficial supplement codex rules with fellow gamer and blogger Liam (aka Frothing Muppet). Here is a few sneak preview shots of my home brewed codex.


The three main units in the list are Lancers (standard Death Riders), Hussars (Death Riders but kitted out with Veteran wargear), and Heavy Dragoons (Death Riders kitted out as Storm Troopers). The Orders and Warload traits are a mishmash of those from Militarum Tempestus and DKoK Assault Brigade with some home brewed ones included. To test them out they faced off against 1000 points of Orks that were very very pimped out. 

Here is the table set out pre deployment.

As Liam and I both blog, we usually start the game by taking a shot of each other for our post. So here is the Muppet. 

We rolled for warlord traits and I scored one of the best ones on my list! 
At least my men would have some cover before running down the Orks!!

Here is the right flank of my army. Two Troops of Lancers, a Command Troop and a Bettery of Lascannons pulled by horses. (I haven't made up the horse team and limbers for the cannons yet so a few standard horses were used in their place).

And the Left flank. A five man Dragoon Troop by the building and a Heavy Dragoon Squadron of a Troop and Command Troop. These guys are 'Storm Troopers' and have been fielded in a 'Platoon' just like you can for Scions. Alternatively, the Dragoons are basic Guard on horses (but fight on foot).

Here is the Ork Waaaagh! Seems like small numbers for 1000p but they had a lot of equipment and everything was in 'eavy armour. By the far hill there were also 3 killa kans. I had two Hussar (veteran) Troops to infiltrate. You can see one on the top right of this photo behind the tree. The other was deployed on the far right flank not far from the deffkoptas.

Turn one saw a mad charge forward toward the Ork line. The Lascannons fired on the kans and a Troop of Hussars send grenades at the deffkoptas but to no effect.
From behind the Command Troop.
The Cannons in the shade of a giant baobab tree.
The small troop of 5 Dragoons dismount to take up position in the ruins. 
The left flank.
Birds eye view (but of course in the game the battlefield has been carpeted in a covering smoke barrage).

One Troop of the Lancers rode forward at a lighting speed, breaking from the covering smoke to charge into the Warboss's Nob unit. -I had given them an order allowing them to run and charge. With an all heroic roll of 10" they just made it!

Little did they know that their valiant charge would be in vain! The Warboss and Nobs managed to shake off the lance blasts, pull the riders from their mounts and brake them with claws and oversized chain weapons. 

In reaction to the cavalry, the Orks advanced beating their chests and shooting wildly into the air.  

 Three deffkoptas fired and then swooped in to mash up the Heavy Dragoon Junior Officer and his men. The Dragoons steadied their horses to gun at the koptas as they hovered in low. A final toss of Krak grenades sent the three Ork fly boys to a fiery end. -It seemed who ever charged was coming out second best!

After waiting for the right moment (infiltrators can't charge in turn 1) the shotgun toting Hussars galloped from their hiding place towards the kans with melta charges primed and ready. One Hassar was downed on the way in but the remaining four rounded on the kans, clamped their charged in place and darted away as the three kans exploded into scrap metal. 

 After the ill fated first charge, the cavalry Captain ordered the second charge and the Warboss and Nobs found themselves caught in a mouth of pointy lance teath!  

The fighting was fast, frantic, bloody and brutal. Only two Nobs, the mighty Warboss and the Captain were left alive! The Captain reared his horse and broke from the combat to recharge his foe. (He had Hit and Run).

Meanwhile, far on the left flank the Huassars and Heavy Dragoons fired on and run though the Orks. Working from one squad to the next they began to clear the left flank.


 Back on the right flank, the mighty Warboss roared a mighty "Waaaagh!" and ran at the Hussars ripping and crushing them into a bloody undistinguishable mess of meat and bone. 

The last two enraged Nobs intercepted the Capitan. He managed to lay one low with a bolter round and dealt the other a crushing wound with his power mace. Unfortunately Orks are notoriously hard to kill and the injured Nob pulled the Captain from his horse and worked at him with his wailing saw.  


 With the Warboss distracted, the left flank Hussars ran unchecked thought the Ork back line, grenading helpless Grots as they scurry about screeching while the Heavy Dragoons made light work of the last of the Ork Boys.

The Warboss angrily eyeballed the riders from a distance realising that his army had been reduced to a single wounded Nob. As lascannon beams struck around him he snarled savagely and stomped off away from the victorious men of the Militarum Equester. Their losses were heavy but the field had been won.

Rule Review

After a debrief, I have a few alterations and adjustments for my supplement. The orders that I had adapted from the Militarum Tempestus supplement were a little too powerful for this list. The Heavy Dragoons (Storm Troopers) ended up being too good. They were very very expensive, but were fast in the movement phase, powerful in the shooting phase and could hold their own in close combat. Their assault capability came from firstly the orders and secondly from having a pistol and close combat weapon as well as 2 Attacks standard (as Death Riders do). I'll drop the 2 Attacks to 1 and with the change to the orders this should pull them back into line. Liam noted that this list lacked 'basic' troops. It is worth mentioning that the Militarum Equester was meant to be an 'elite' army such as the Militarum Tempestus, but it is also true that the list that I ran included only 5 of the more 'basic' Dragoons. These guys didn't really see action, but I'll build a few more for our next game which should round off the force a little better. I also had options to field Heavy Mortars, Quad Launchers and Rapier Laser Destroyers (pulled by horse teams) in the army, so I'll try them out next time along with a few special characters that I included. All in all the rules were not a failure but some tweaking is still needed. 
Because some of the rules are replications of the 40k codex's (Astra Militarum, Militarum Tempestus and DKoK) I am hesitant to post them here in their entity. If any of my fellow bloggers would like to look over them however, feel free to drop me a private email at: colonel 'dot' ackland 'at' adam 'dot' com 'dot' au

Tallyho! 

The Fall Of Praetoria: by Warhammer 40K Campaigns

$
0
0

Attention citizen soldiers of glorious Praetoria.

Praetoria stands at Her hour of need.

The call has gone out across the galaxy, to our regiments, our neighbours, our allies and the mighty warriors of the Holy Emperor. Our appeals will not go unheard.

Now we must ready ourselves for the ultimate fight . Lest Praetoria be lost… Praetoria fall… Praetoria be no more.


Now that I have set the mood... whilst r

andomly surfing the net I came across some brilliant new Praetorian art work. At first I thought it was fan work posted on deviant art. As I found more I thought it must be from Fantasy Flight games, meaning Praetorians would appear in their RPG – an awesome prospect. Then I found the source site and I read the words ‘The Fall Of Praetoria’.


Warhammer 40K Campaigns is (as the name suggests) a campaign site that is still in development awaiting launch. It is being created by 40k fans for 40k fans. The ‘studio team’ is based in France but will have all content also available in English. Here is their own description of the site taken from their facebook page:


“Warhammer 40K Campaigns will include new campaigns for Warhammer 40.000 universe. Website will propose to players a complete history, a forum, items to be unlock, unique illustrations and more...


Website will be in English and French.


This fantastic collaboration will allow to the website to coming in 2014. All Facebook followers will have an exclusive access to beta test.


First Campaign will be The Fall Of Praetoria :

Campaign takes place on Praetoria Hive World, Imperium fights against a massive Ork invasion.

3 Adeptus Astartes, 6 Imperial Guard Regiments, and 4 Ork clans fight for ascendancy of the planet.


Takes place in this great adventure !


Future is in your hands on http://warhammer-40k-campaigns.com/ ...


Studio team.”


Obviously some help with English translation is needed but I was very excited by what I saw.

I was still full of questions about this project so I wrote to the studio to find out more. I was mostly interested in ‘how’ and ‘who’ rather than the exact details of the site and campaigns – fan made materials are some of the best but sometimes it gets squashed before it gets going.

Here is my short Q&A with Guerin Anselme the project manager (he apologised for his French-English translation).


Q) What is the studio behind Warhammer 40K Campaigns? This has been listed as a ‘fan based project’ so who are you guys?


A) The studio is a band of friends, 1 webdesigner, 1 encoder, 1 project manager and freelance graphic designers, others are volunteers, family member ... Only a fan project with friends in the trade and budget.


Q) From what we have seen of the project there is clearly a lot of work going into it. Are people donating their time or is it being financed some way?


A)  It comes to personal time to the whole project except the illustrations and proofreading English translations so that these are not a mixture of French / English. Project cost 7000 to 10000€ funded by the project manager.


Q) Game workshop are notorious for crushing fans and their projects, are you worried about IP infringements?


A)  I have an authorization  email from GW, all texts are created by us and illustration are also our property, it is not forbidden to use the universe of Warhammer 40k. We rely on fans to help support us with donations after opening site for it grows, the project manager is an ambulance driver he can invest more in the project.


Q) Many veteran gamers love Praetorians what made you choose them as the focus of the first Campaign?


A)  Because I’m a veteran gamer (20 years in hobby) and I really love Praetorian, so "Fall of Praetoria" is born.


Q) Is there anything that fans can do to contribute to this project?


A) Yes sure, when website will opening, we hope to have financial support (even $ 1 per person) for the server and of course create other campaigns. But we will need forum moderator (French and English), people who creating blog posts, painting tutorials, any help is welcome as simply ideas to improve the site.


We went on to discuss people’s Praetorian projects and background articles.  Guerin added “Of course we are looking for all the [praetorian] background including those of the fans and our main goal is to be closer to the fans even if we cannot satisfy everyone.”


Here are a few previews (sorry for the small size).


Due to primarily being a volunteer project it has had some delays and so will not be ready to launch in 2014 as planned. However, Guerin did say that we can expect to see an update on the home page soon and it will be launched in 2015 so watch this space! 


To follow the updates on this project check out their facebook page here. I, for one, am very excited about all that has been planned. I fondly remember past 40k worldwide campaigns and I'll be keeping a very keen eye on how this develops. 

On that note I'm off to finish what I have on my model desk so I can paint up some more Praetorians!

Brimlock Dragoons and Praetorian Infantry Progress

$
0
0
Time for another update on the 1st Carabiniers, Brimlock Dragoons.
The background and first progress post on these guys are both back here.

From last post, I finished sculpting the big jacket cuffs and I added a targeting monocle. I thought this was an important addition to help balance the historical feel with the sci-fi aspect of the unit. Here are the first three monocles. 

I used a small copper rod to create the eye part. 

Here are all five with their targeting monocles done. I also sculpted a thumb for the banner bearer and added a few other details. 


The officer needed a button to hold his backpack rifle sling in place. With a bit of poking with a needle it became a tiny scull. 


Here are all of the riders finally undercoated ready for painting. 


The first undercoat of Shining Gold. 


I worked up the gold with lighter shades (Burnished Gold) and gave it a highlight with a silver-gold mix. I have painted on most of the other base colours but haven’t got very far into shading each of them yet. At this halfway point their overall look is beginning to come together.


Aside from these riders I have lined up the next projects that I want to finish off. In my cabinet I have moved my painted Praetorians to the side so I can fit in another platoon. They are undercoated and starting to get some colour on them. 


I also have some officers and commissars waiting behind them.


On my top shelf I set up all of my almost finished projects. They all just need a final push to get them done. 


Planning further forward, I wanted to make a platoon of ‘bearded’ Praetorians, except none of the original special weapon Praetorian models had beards. Thus, three flamers got a slight re-sculpt. 


After starting I was beginning to think that beards were beyond my sculpting skill but I managed to pull off reasonable looking beards. 


That’s been my month. I was recently saying to my mates that if I could find a free weekend I could get the Dragoons finished. Alas, I will have to be content with before bed 20 to 30 min periods of ‘wind down’ time. When it comes to hobby time I’ll take whatever I can get. 

Before signing off, a buddy of Muppet and mine has stared up his own blog too. It is called 'In a hole in the ground there lived a Hobbyist'. Here are a few previews from his first 2 posts:
New light box.
Master of the Forge  
Grey Knight
Now we only have one gaming buddy in our group of four without a blog. I wonder how long he will last before caving in!

Cheers for stopping by,

Tallyho.

Contextualising My Praetorians (and a Big Gun Emplacement)

$
0
0
Well, it has been quite a break between solid painting posts. This blogging drought ends here! Starting this month I will attempt a feat that I have never achieved ever in my last 4 years of blogging... I will blog weekly painting posts. {gasp} I'm know right, a very dangerous deed! I don't know how long it will last but there will be no retreating! 

In this post I painted up my Earthshaker Cannon, but what this post is really about is the symbols and icons that I have added to my Praetorian force. Lately, I have been putting large emphases on making sure that my armies have a strong identity. For my golden Necrons this has been through the elaborate city terrain that represents their crown world. Praetorians by themselves have a strong theme but I wanted to introduce a few icons to the army to cement their character and identity across the force.


One of my favourite Forge World campaign books is IA 12 ‘The Fall of Orpheus’. The background section is superb and I am a big fan on the new campaign army lists. The Necron Dark Harvest list is the basis of my golden Necron force allowing me lots of flayed ones, while the DKoK Assault Bridge heavily influenced my home brewed Cavalry Codex. [edit: I know the new Necron codex is out today but I have no idea how my force will adapt just yet]. It seems fitting then that I should set my heroic Necron v Praetorian war in the Orpheus sector. It may be part of the final Orpheus Salvation campaign or possibly one of the earlier campaigns in the history of the Orpheus sector. Passably at the conclusion of the Orphean War of Faith? Either way, the Praetorian campaign will be an off shoot of the main force which are fighting over a Necron Crown World tomb city. Did they stumble across it by chance? Were they sent there on a special mission? I haven’t decided yet. But I do know that whatever happened there was significant enough to be completely removed from all Imperial records (save maybe a lone document sealed away deep in an inquisitional vault somewhere).
 
Of course none of that really matters, the point is that I decided to paint the Orpheus Sector Campaign badge on to my Praetorians units to signify what they are doing and where they are in the galaxy. I was not entirely sure that it was something that was within my skill level. After all, it is pretty complicated. One Saturday morning I rallied my courage, picked up an Earthshaker (giving me a nice big flat area) and gave it a crack.

I lightly panted it first in white, then went over the top in black and finally filled in the centre with a dark grey. The Orpheus temple in the centre is not perfectly cantered but all in all I called it a success. The next thing that I wanted to give my Praetorians was a nice looking Praetorian Army badge. I really liked the red lion that identifies the Praetorians on the art by the ‘40k Campaign’ group.  Colonel Winterborne has done some fantastic free hand painting on his Praetorians too. Inspired by this I thought I’d give a big red lion a try next.
(here is some of the art from 'Warhammer 40k Campaigns')
I started lightly in white.
The red was a little dark in places so I went over it again in white (err, pink) to get a nice bright red.
With the red lion done I thought I’d better push on and finish off the rest of the Earthshaker too! 
Pulling out my transfer sheets I tossed on an eagle.
Black and white kill marking was a must.
Stuff up the first one. I was using "Micro Set" and I was not prepared for how much it softened the transfer. 
Take two. Got it this time!
I added the gun number on the left and suddenly it started to look a bit crowed on the shield... 
So I took the eagle off again.

Gotta have some barrel text! "contritio a praetorianis" should translate to "destruction guard" or "destruction by the Praetorian". I was aiming for the latter.
And "Praetoria CXXII" for the 122nd regiment.
Next I gave it all a heavy weathering with Forge World powders and sealed it with a wash.

There is still a bit to go on this but it is mostly there. First up will be a dull coat spray, then some equipment and shells on the base and finally some crew. A few days later I wasn't 100% happy with the lion. Not enough to wipe the whole thing and start again mind you! Still I wanted to get the lion looking right for the next project. To practice I grabbed a little plastic tent and attempted another red lion.

First time the legs were wrong.
But I got it eventually.
I was much happier with the new proportions of the lion and so I decided this would be my 'template' for the next time I paint it. Immediately after this I pulled out a whole bunch of Praetorian things and started painting red lions on them. I'll show you a few of those next week.

Until then, 

Tally ho.
Viewing all 93 articles
Browse latest View live


Latest Images